'%3E%3Ctitle%3Esun%3C%2Ftitle%3E%3Cpath%20d%3D'M30.4%2014.72q0.64%200%201.12%200.384t0.48%200.896q0%201.28-1.6%201.28h-1.536q-1.6%200-1.6-1.28%200-0.512%200.48-0.896t1.12-0.384h1.536zM16%207.232q3.648%200%206.24%202.56t2.592%206.208q0%203.712-2.592%206.272t-6.24%202.56-6.208-2.56-2.56-6.272q0-3.648%202.56-6.208t6.208-2.56zM16%2022.4q2.624%200%204.512-1.856t1.888-4.544q0-2.624-1.888-4.512t-4.512-1.888-4.512%201.888-1.888%204.512q0%202.688%201.888%204.544t4.512%201.856zM4.8%2016q0%201.28-1.6%201.28h-1.6q-1.6%200-1.6-1.28%200-0.512%200.48-0.896t1.12-0.384h1.6q0.64%200%201.12%200.384t0.48%200.896zM16%204.8q-0.512%200-0.896-0.48t-0.384-1.12v-1.6q0-0.64%200.384-1.12t0.896-0.48%200.896%200.48%200.384%201.12v1.6q0%200.64-0.384%201.12t-0.896%200.48zM16%2027.2q0.512%200%200.896%200.48t0.384%201.12v1.6q0%200.64-0.384%201.12t-0.896%200.48-0.896-0.48-0.384-1.12v-1.6q0-0.64%200.384-1.12t0.896-0.48zM27.776%206.080l-1.088%201.088q-1.088%201.088-2.048%200.256-0.896-0.896%200.256-2.048%200.128-0.192%201.088-1.152%201.152-1.088%202.048-0.192t-0.256%202.048zM5.376%2024.896q0.448-0.512%201.056-0.576t0.928%200.32q0.384%200.384%200.32%200.992t-0.512%201.056l-1.152%201.152q-0.448%200.448-1.056%200.512t-0.928-0.32q-0.96-0.896%200.192-2.048%200.192-0.128%201.152-1.088zM6.016%204.224l1.152%201.152q1.152%201.152%200.192%202.048-0.32%200.32-0.928%200.256t-1.056-0.512q-0.96-0.96-1.152-1.088-0.448-0.448-0.512-1.056t0.32-0.992q0.32-0.384%200.928-0.32t1.056%200.512zM24.896%2026.688q-1.152-1.152-0.256-2.048t2.048%200.256l1.088%201.088q1.152%201.152%200.256%202.048t-2.048-0.192q-0.96-0.96-1.088-1.152z'%2F%3E%3C%2Fsvg%3E)
Welcome to my World!!!
Kenasian Sweet Delights - Cakes Cookies

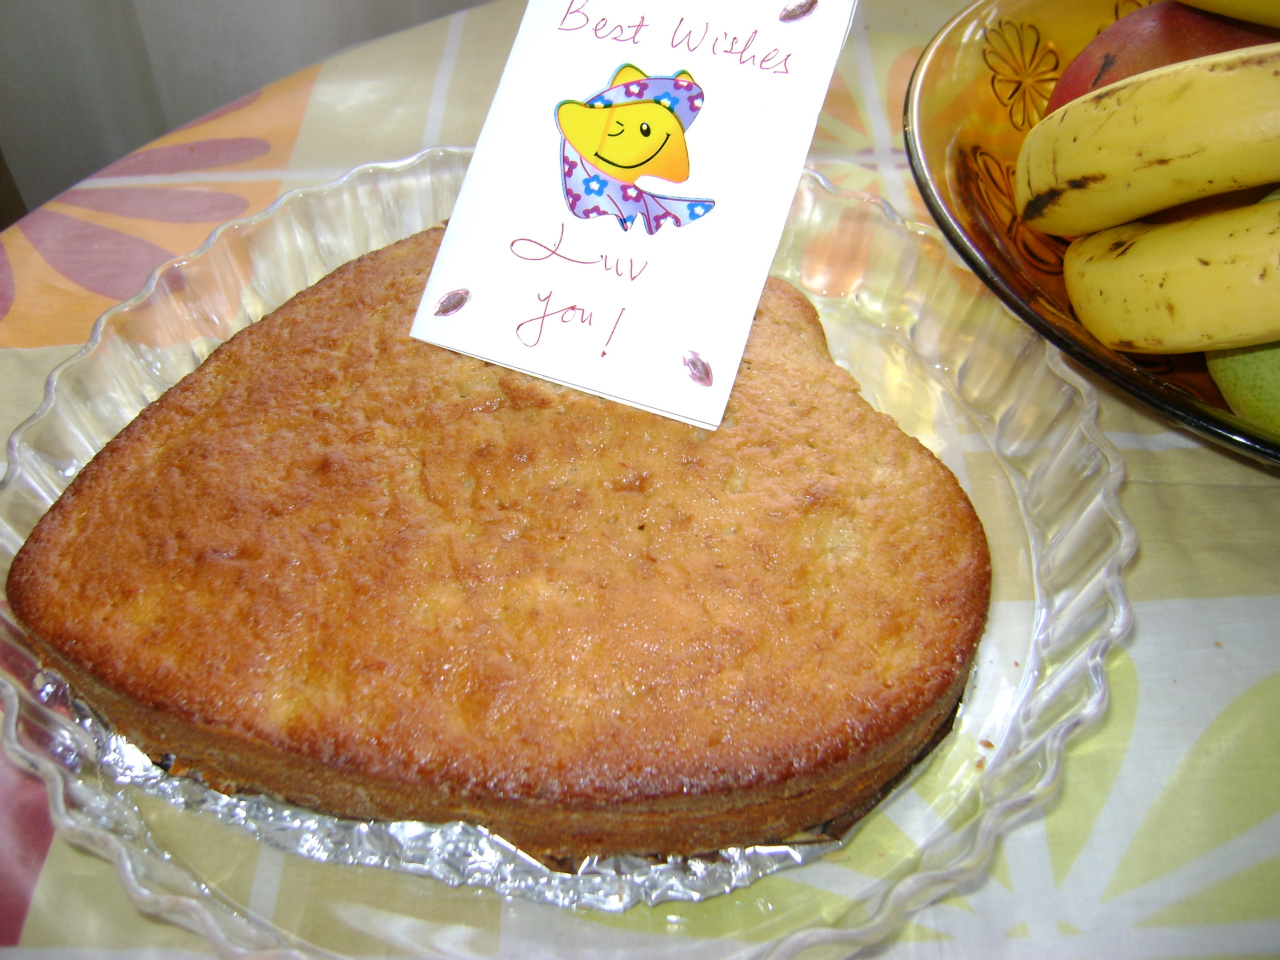
Serves 6 Cardamom Cake
What you need
For the mixture
2 cups, level, self raising baking flour
1 cup melted margarine/butter
3/4 cup fine white sugar
6 eggs
4 cardamom pods
2 tablespoons milk
For preparing cake tin
25 cm round or rectangular baking tin
1 tablespoon margarine
1 tablespoon flour
For preparing oven
180 degrees C, preheated for 10 minutes
small steel bowl with water placed on bottom of oven to keep cake moist
wire rack placed in middle of oven
Mum's Elaichi Cake
How to
Steps:
1. In a large bowl, break the eggs, one at a time and beat with a wooden spoon.
2. Add the sugar, the margarine and the milk. Mix thoroughly.
3. Coarsely crush the seeds from the cardamom pods and add to the mixture.
4. Put in the flour and mix slowly till a smooth, creamy mixture is obtained. Check that there are no lumps.
5. Prepare the baking tin by rubbing the margarine all over the inner surface and sprinkling the flour lightly all over it.
6. Pour carefully the mixture into the cake tin. With a butter knife or spatula make the surface smooth and the middle a little depressed to allow for even rising of the cake.
7. Place the cake tin on the rack of the preheated oven and let it bake for 1 hour.
8. Check the cake by poking in a skewer or butter knife.
If it is ready the skewer or knife will come out clean. In case some mixture comes out then you will have to leave the cake in for about ten more minutes. The cake should be golden brown.
9. Put off the oven. Remove the cake tin and let it cool for about 10 minutes.
10. Carefully ease out the cake and place it on a cake dish. Immediately cover it with cling-film to preserve the moisture and keep the cake soft.
11. Serve the 'cardamom cake' when completely cool with tea or juice

Serves 6 Sponge cake
What you need
For the Mixture
1 +1/2 cup self raising flour
1 cup fine white sugar
6 eggs
1 tablespoon vanilla essence
For preparing Cake tin
25 cm long cake tin
1 tablespoon margarine
1 tablespoon dry flour
For preparing Oven
Preheat for ten minutes at 180 degrees C.
Place small steel bowl with water at base of oven to keep the cake moist
Put the rack in the middle of the oven
For Decorating [Optional]
1 cup fresh cream
1 cup diced fruit of your choice
1 tablespoon icing sugar
Sponge Cake
How to
Steps:
1. In a large bowl, put in the eggs, one at a time and beat for a minute.
2. Add the sugar and whisk till white and fluffy
3. Add the essence and mix.
4. Add the flour and mix thoroughly till the mixture is smooth and creamy.
5. Prepare the baking tin by rubbing the margarine on the inner surface and sprinkling the dry flour all over it.
6. Pour the cake mixture into the baking tin. Smooth the surface with a butter knife and keep the middle of the mixture a bit depressed to allow for even rising of the cake.
7. Place the mixture onto the rack in the oven and let it bake for 35 minutes.
8. Check the cake with a skewer. If it comes out clean the cake is done. If there is cake mixture on it then let the cake bake for another 10 minutes.
9. Put off the oven. The cake should be golden.
10. Remove and let the cake cool down for 10 minutes.
11. Ease out with a spatula and place onto the cake dish.
12. Decorate with fresh cream, fruit or plain icing sugar.
13. Serve the 'sponge cake' with tea or as a sweet dish with custard and jelly.

Serves 6 vanilla vanity
What you need
For the Cake Mixture
3/4 cup melted margarine
1 cup fine white sugar
1+1/4 cup self raising flour
1 tablespoon milk
1 tablespoon vanillaor essence
3 eggs
For Preparing Cake Tin
24 cm baking tin
1 tablespoon margarine
1 tablespoon dry flour
For Preparing Oven
Preheat for at least ten minutes at 180 degrees C
Small steel bowl with water placed at base of oven to keep the cake moist
Rack in the middle of the oven
For Decorating [Optional]
1 tablespoon icing sugar
Vanilla Vanity
How to
Steps:
1. In a large bowl, mix the sugar and the margarine with a wooden spoon.
2. Add one egg at a time and mix thoroughly.
3. Add the milk and the essence.
4. Add the flour and mix into a smooth, creamy consistency.
5. Prepare the baking tin by rubbing the margarine onto the inner surface and sprinkling with the dry flour.
6. Pour the mixture into the baking tin and make the surface smooth with the spatula, depressing the middle a little so that the cake rises evenly.
7. Place onto the rack and let the cake bake for 1 hour. It should be brown and when you poke in the skewer it should come out clean.
8. Put off the oven, remove the baking tin and let it cool for 10 minutes.
9. Ease out the cake with the help of a spatula and place onto a cake dish.
10. You may sprinkle some icing sugar onto the surface.
11. Serve the 'vanilla vanity' with tea or juice.
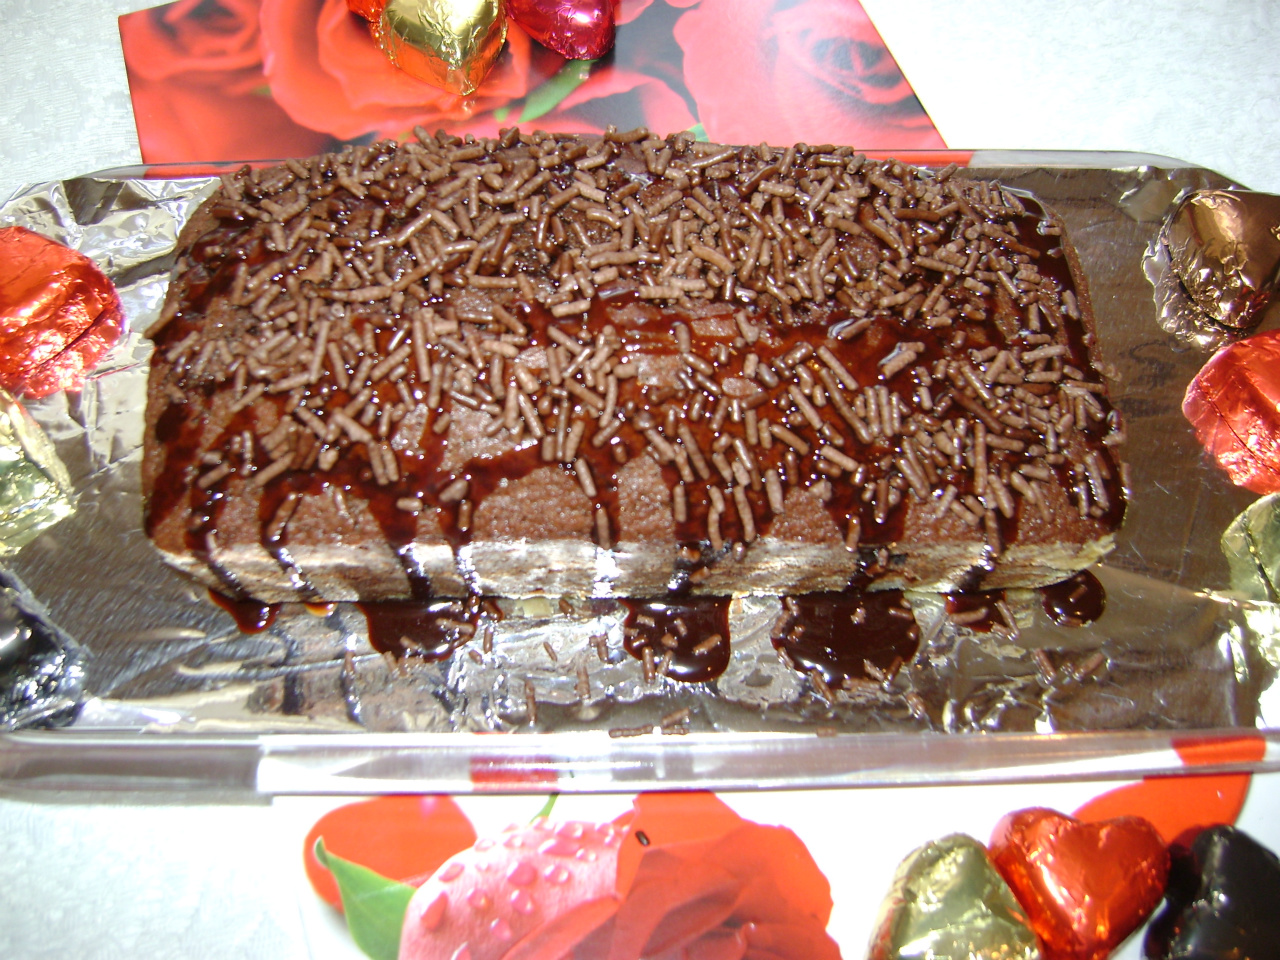
Serves 6 chocolate delight
What you need
For the Cake Mixture:
3/4 cup melted margarine
3/4 cup sugar
3 eggs
1+1/4 cup self raising flour
2 tablespoons warm milk
3/4 cup drinking chocolate powder
For the decoration:
2 tablespoons chocolate syrup
2 tablespoons chocolate shavings or grated
For preparing Baking tin
25 cm cake tin
1 tablespoon margarine
1 tablespoon dry flour
For preparing oven
Preheat for 10 minutes at 180 degrees C
Place small metal bowl of water at base of oven to keep cake moist
Rack in the middle of oven
Chocolate Delight
How to
Steps:
1. In a large bowl, mix the margarine and sugar for a couple of minutes.
2. Add the eggs, one at a time and mix.
3. Add the flour a little at a time and mix thoroughly till you have a smooth, creamy mixture.
4. In a separate small bowl, mix the chocolate powder and milk till smooth.
5. Add this to the cake mixture and mix till it is evenly chocolate brown.
6. Prepare the baking tin by rubbing the margarine onto the inner surface and sprinkling it with the dry flour.
7. Pour the mixture into the tin and smooth the surface with a spatula. Make a slight depression in the middle of the mixture to get an evenly risen cake surface.
8. Place into the oven and let it bake for 1 hour.
9. Check that a skewer poked in comes out clean to ensure complete baking of the cake.
10. Put the oven off and remove the cake tin. Allow it to cool completely.
11. Ease out the cake with a spatula and place it onto the cake dish.
12. Decorate the cake by putting the chocolate syrup on the top surface and sprinkling with the chocolate shavings.
13. Serve the 'Chocolate Delight' with tea, milk-shake or juice.
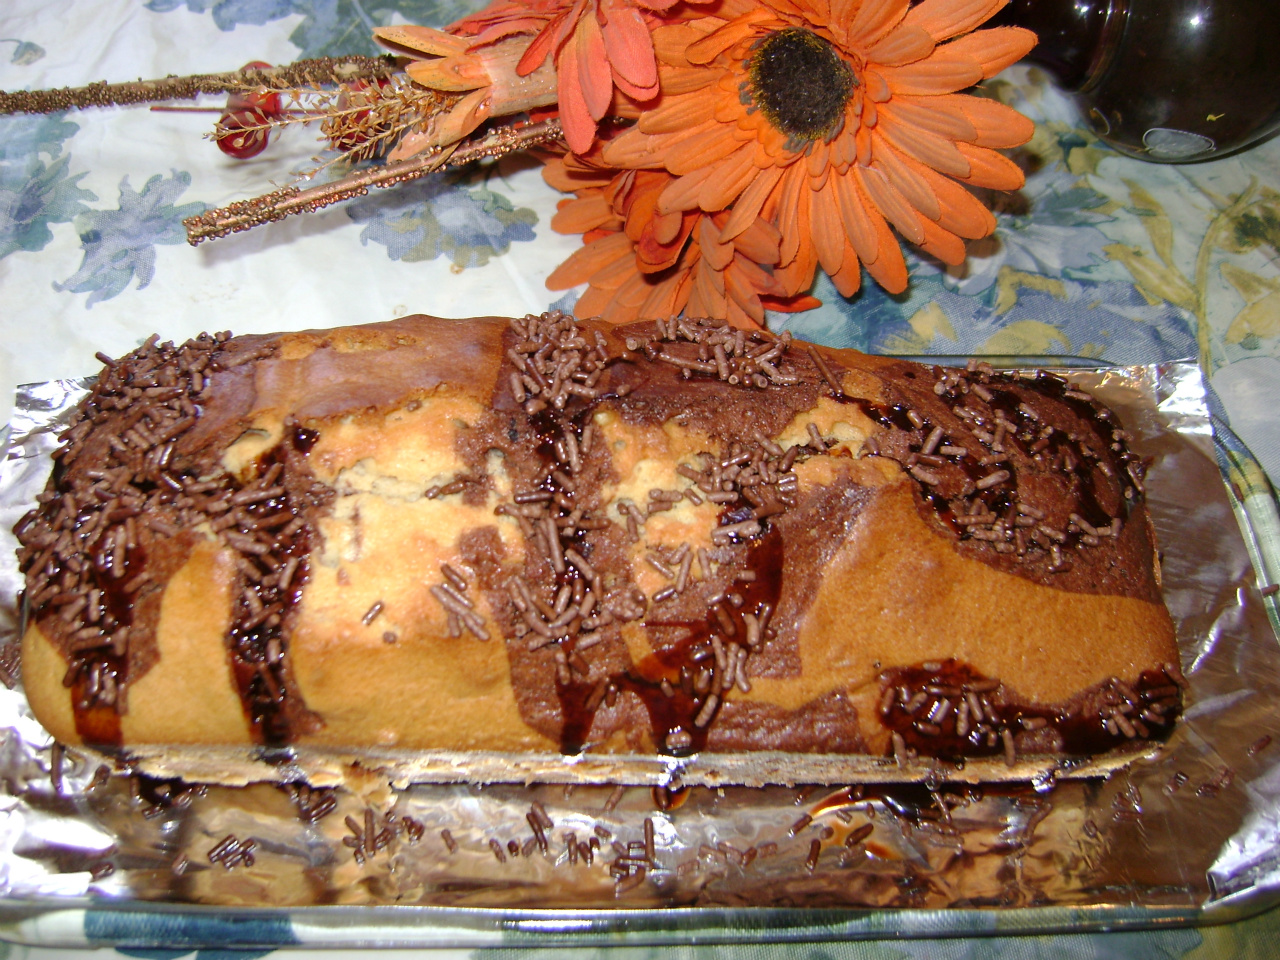
Serves 6 marble mix
What you need
For the Cake Mixture:
2 eggs
2 cups self raising flour
1 cup castor sugar
3/4 cup melted margarine
1/4 + 1/4 cup milk
1 teaspoon vanilla essence
4 tablespoons drinking chocolate powder
For the Decoration:
2 tablespoons chocolate syrup
1 tablespoon grated/chipped chocolate
For preparing baking tin:
1 any shaped 25 cm cake tin
1 tablespoon margarine
2 tablespoons dry flour
For the Oven:
Preheated for 10 minutes at 180 degrees C.
Wire rack in the middle of the oven
Small metal bowl of water kept on base to prevent cake from drying up while baking.
Marble Mix
How to
Steps:
1. In a large bowl, put the sugar and the margarine together. With a wooden spoon, mix till light and fluffy.
2. Add the eggs one at a time, beating each thoroughly.
3. Fold in the flour a little at a time and mix well for at least 10 minutes.
4. Divide the mixture into 2 parts, keeping each part in a separate bowl.
5. In one part add the vanilla essence and 1/4 cup milk; mixing it thoroughly.
6. In a small bowl put the other 1/4 cup milk and add the chocolate powder. Mix.
7. Add this chocolate mix to the second part of the cake mixture from Step 4. Mix thoroughly.
8. Prepare the baking tin by smearing the margarine onto its inner surface and sprinkling the dry flour all over it.
9. Put one tablespoon of the vanilla mixture in the tin and then one tablespoon of the chocolate mixture next to it.
10. Go on putting the mixtures alternatively on the base of the tin.
11. Make another layer over the first one, but this time, put the chocolate mixture over the vanilla mixture and vice versa.
12. Bake the cake in the preheated oven at 180 degrees C. for 45 minutes to ! hour.
13. Check the top of the cake - it should be brown and when you pierce it with a skewer/knife, this should come out dry.
14. Remove from the oven and let it cool for at least 20 minutes.
15. Carefully ease out the cake from the tin and place it on the cake dish.
16. Spread the chocolate syrup on the top of the cake and sprinkle the grated/chipped chocolate over it.
17. Keep it covered with an appropriate glass cover to preserve the freshness of the cake.
18. Serve the 'Marble Mix' cake with tea, juice or milk shake of your choice.
Serves 6 banana bash
What you need
For the Cake Mix:
2 eggs
1+1/2 cup self raising flour
3/4 cup melted margarine
3/4 cup castor sugar
1/4 cup milk
1 cup coarsely mashed ripe banana
For preparing cake tin:
25 cm baking tin
1 tablespoon margarine
2 tablespoons dry flour
For preparing oven:
Preheat for 10 minutes at 180 degrees C
Keep rack in the middle level of the oven
A small metal bowl with water kept on the base of the oven to preserve the moisture in the cake.
Banana Bash
How to
Steps:
1. In a large bowl, mix the sugar and the margarine thoroughly with a wooden spoon.
2. Beat one egg at a time and add to the mixture.
3. Add the flour a little at a time and mix thoroughly.
4. Add the milk and mix.
5. Add the banana mash and gently fold in with a fork.
6. Prepare the baking tin by greasing its inner surface with the margarine and dusting it with the dry flour.
7. Pour the cake mix into the baking tin and with a fork level the surface, making a slight depression in the middle so that the cake rises evenly.
8. Bake the cake for 45 minutes to 1 hour at 180 degree C.
9. Check that the top of the cake is golden brown and when you pierce a skewer in it, this comes out dry.
10. Remove from the oven and let it cool down for at least 20 minutes.
11. Ease out the cake onto dish and keep covered with cling-film to preserve the freshness of the cake.
12. Serve the 'Banana Bash' cake with tea, juice or milk shake.
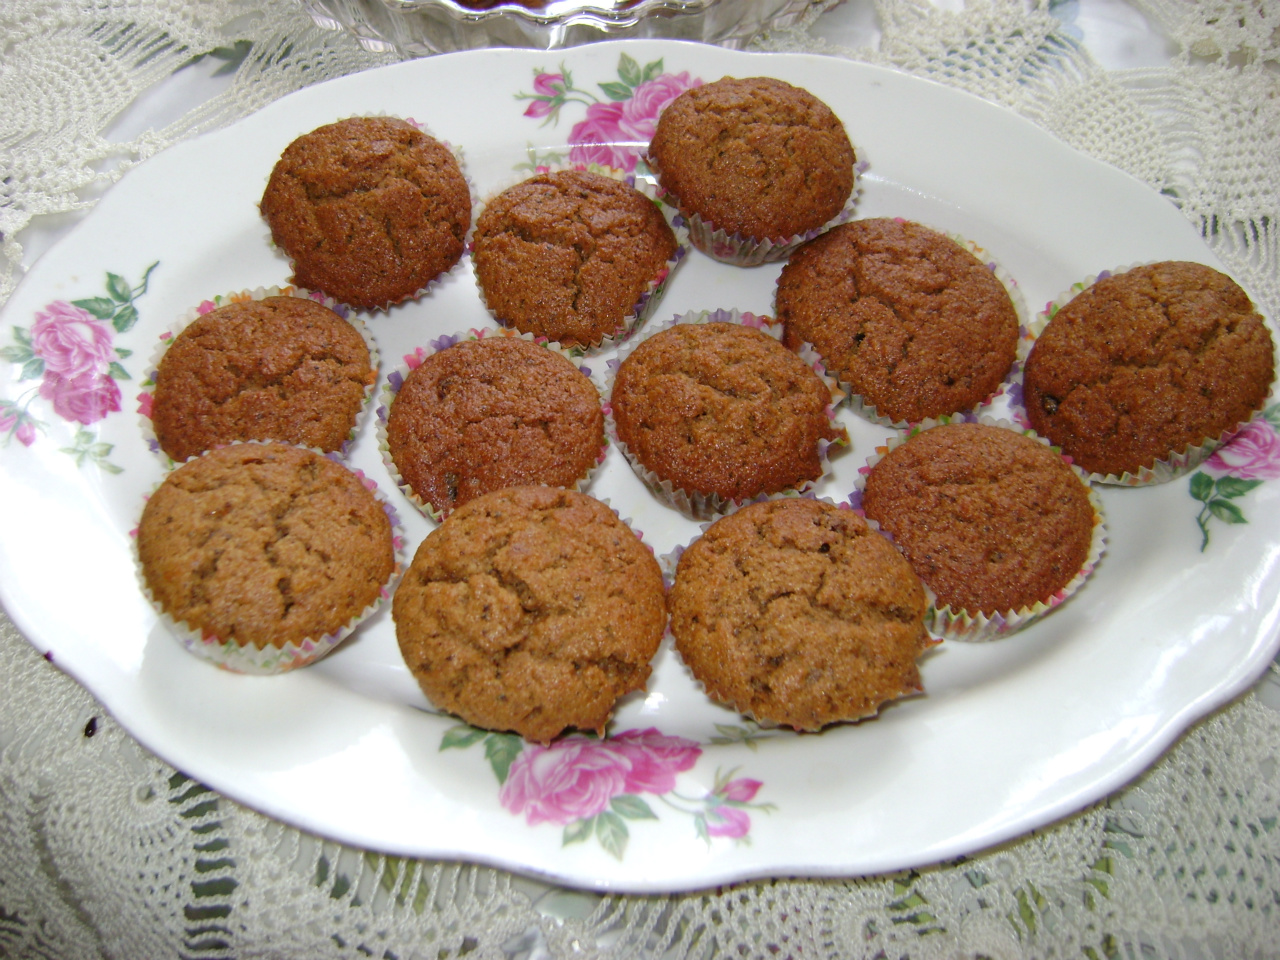
Serves 6 carrot cups
What you need
For the cake mix:
2 eggs
3/4 cup soft brown sugar
1 cup fresh cooking oil
1+1/4 cup whole meal flour
1/4 teaspoon salt
2 teaspoons baking powder
2 teaspoons fine cinnamon powder
1/2 cup raisins
1+1/2 cup finely grated carrots
For preparing the oven:
Preheat for 10 minutes at 180 degrees C
Rack in the middle of the oven
Small metal bowl with water at base of oven to preserve the moisture in the cake
For the Baking:
Baking tray with 12 cup cake depressions
12 paper cups
Carrot Cups
How to
Steps:
1. In a bowl mix the sugar and the oil with a wooden spoon.
2. Beat the eggs one at a time and add to the mixture.
3. Add the flour, baking powder and salt. Mix thoroughly.
4. Add the cinnamon powder, raisins and the grated carrots. Mix gently.
5. Place a paper cup in each of the depressions in the baking tray.
6. With a tablespoon, carefully put the cake mix into each of the paper cups.
7. See that you do not fill more than two thirds of the paper cups to avoid spilling over during the baking.
8. Bake at 180 degrees C for 30- 40 minutes.
5. Check that the top of the cakes are brown and when you pierce them with a skewer, it comes out dry.
6. Remove the baking tray and allow to cool for ten minutes.
7. Carefully remove the cup cakes and place on a cake dish. Cover appropriately to preserve the freshness of the cakes.
8. Serve the 'Carrot cups' with tea, juice or milk shake.
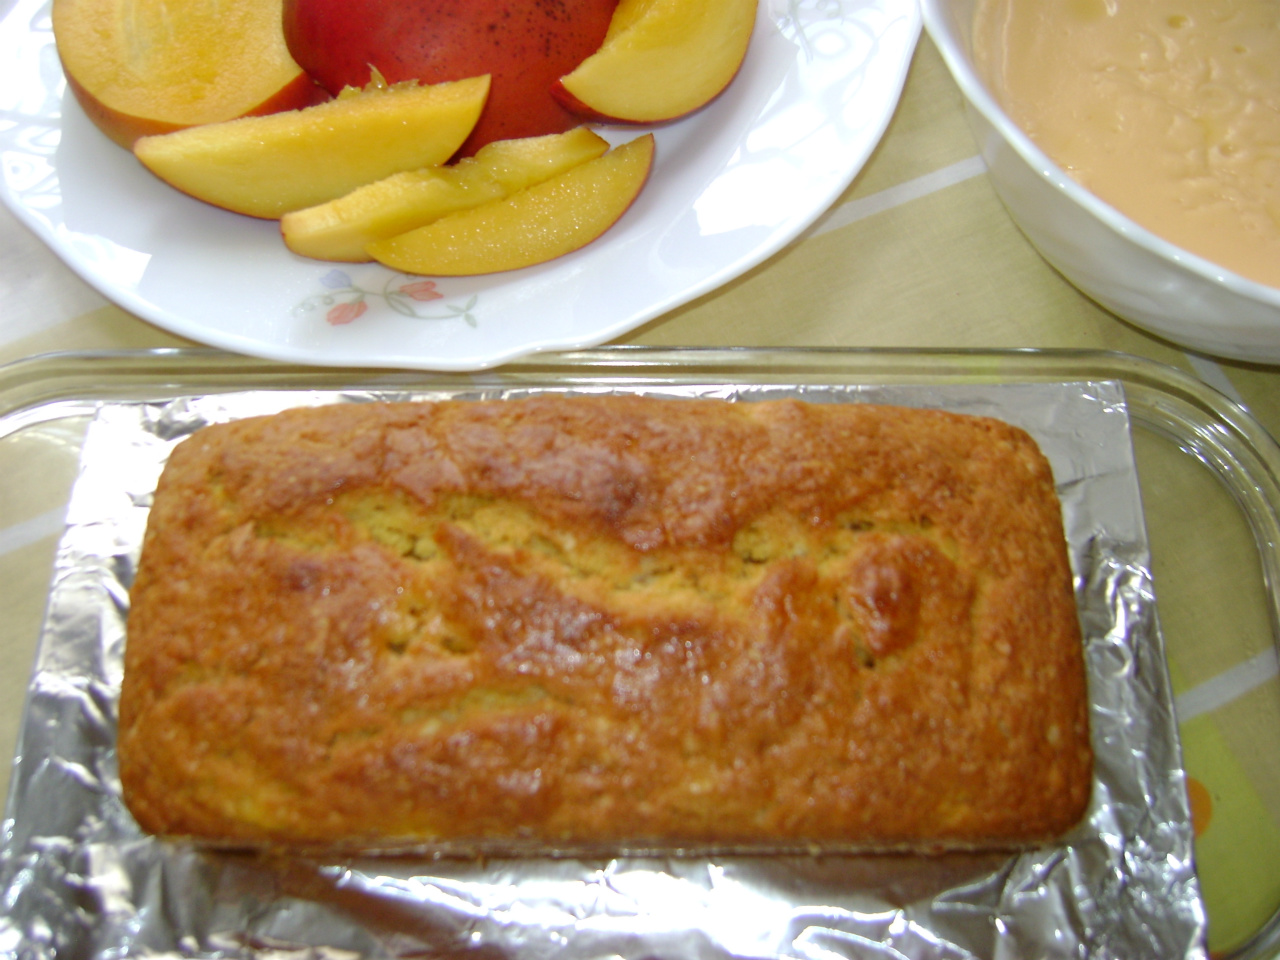
Serves 6 mango munch
What you need
For the cake mix:
1 cup self raising flour
1/2 cup castor sugar
1/3 cup melted margarine
2 tablespoons mango juice
1 cup finely cut cubes of sweet, ripe mango
For preparing cake tin:
A 25 cm baking tin
1 tablespoon margarine
2 tablespoons dry flour
For preparing the oven:
Preheat for 10 minutes at 180 degrees C
Small metal bowl with water at base of oven to preserve moisture in the cake
Rack in the middle level of the oven
Mango Munch
How to
of t
Steps:
1. In a bowl, mix the margarine and the sugar with a wooden spoon.
2. Add the flour and mix thoroughly for 5 to 10 minutes till creamy.
3. Add the juice and the mango cubes. Mix gently.
4. Prepare the baking tin by smearing the inner surface with the margarine and sprinkling the dry flour over it.
5. Pour the cake mix into the tin and level it with a fork, making a slight depression in the middle to allow even rising of the cake.
6. Bake for 30 to 40 minutes.
7. Check that the top of the cake is just golden brown and when you pierce it with a skewer, this comes out dry.
8. Remove from the oven and let it cool for at least 15 minutes.
9. Ease out the cake and carefully place it on a cake dish.
10. Cover it with cling film to keep its freshness.
11. Serve the 'Mango Munch' cake with custard, milk shake, juice or tea.
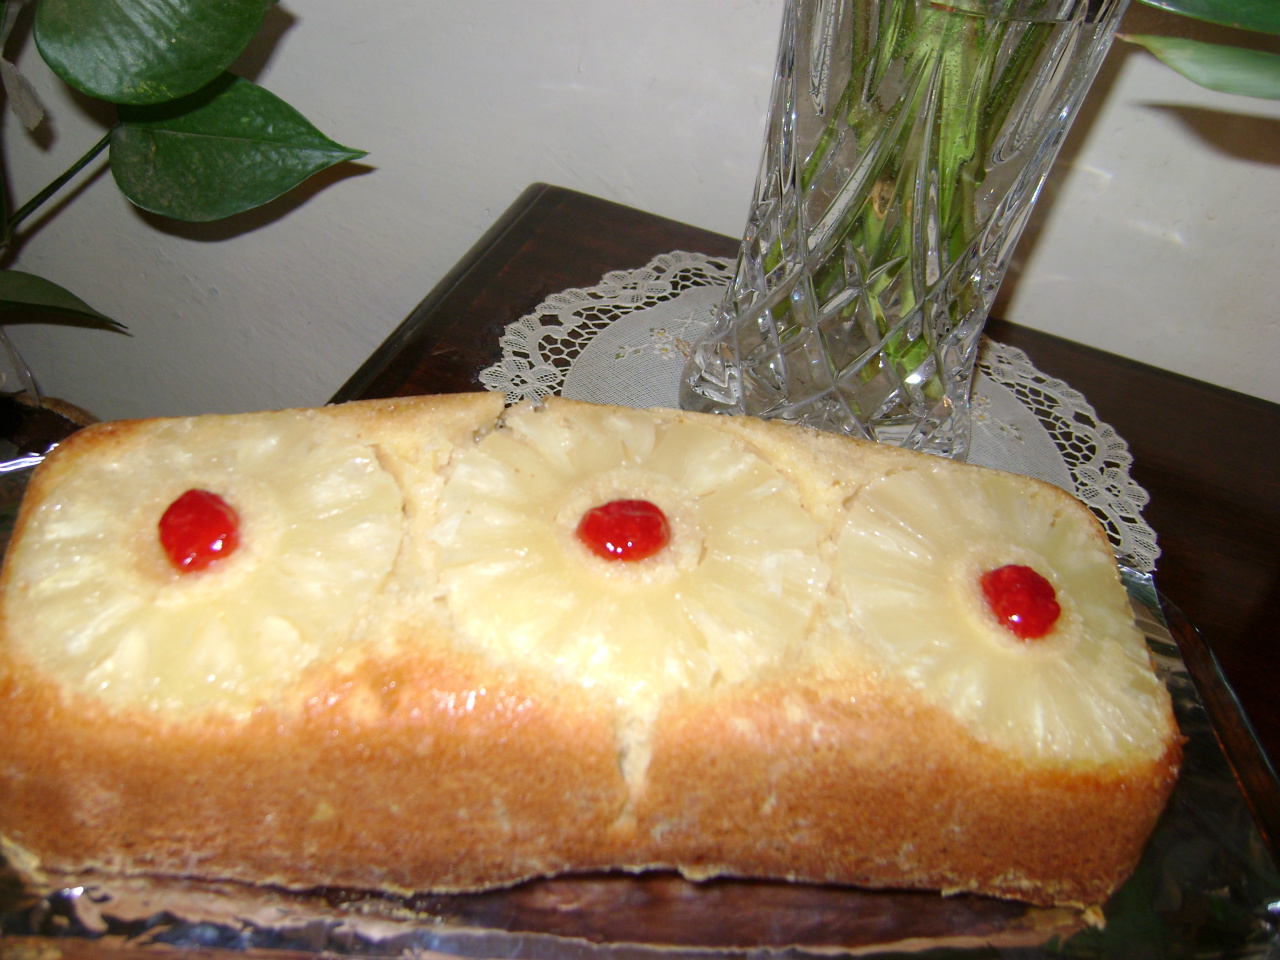
Serves 6 pineapple upside down
What you need
For the Cake Mix:
1+1/4 cup self raising flour
3/4 cup castor sugar
3/4 cup melted margarine
2 eggs, beaten
2 tablespoons pine-apple juice
For the topping:
3 round slices of drained, tinned pine-apple
1 tablespoon brown sugar
For the decoration:
1 tablespoon pine-apple juice
1 tablespoon red fruit jam
3 red candied cherries
For preparing the cake tin:
1 rectangular [25 cm x 12 cm x 8 cm] baking tin
1 tablespoon margarine
2 tablespoons dry flour
For preparing the oven:
Preheat for 10 minutes at 180 degrees C
Wire rack placed in the middle level of oven
Small metal bowl with water placed at base of oven to preserve the moisture of the cake
Pineapple Upside Down
How to
Steps:
1. In a large bowl, mix the margarine and the sugar with a wooden spoon.
2. Add the eggs and mix well.
3. Add the pine-apple juice and mix.
4. Add the flour, a little at a time and mix thoroughly for 10 minutes till you have a creamy mixture. Keep aside.
5. Prepare the baking tin by greasing its inner surface with the margarine and dusting the dry flour all over it.
6. Sprinkle the brown sugar only on the base of the tin.
7. Carefully, place in a row, the three drained pine-apple slices flat on the sugar, on the base of the tin.
8. Pour slowly the cake mix over the slices to cover them evenly.
9. Flatten the surface of the cake mix with a fork or spatula and make a slight depression in the middle to allow even rising of the cake.
10. Bake at 180 degrees C for 45 min to 1 hour.
11. Check that the cake is golden brown and when you pierce it with a skewer or tooth-pick, this comes out dry.
12. Remove the cake from the oven and let it cool for at least 20 minutes.
13. Carefully, with the help of a spatula ease out the cake and place it up-side down on the cake dish so that the pine-apple slices are facing up.
14. Sprinkle the pine-apple juice over the cake.
15. Put a little red jam and a cherry in the middle of each of the three slices of pine-apple.
16. Serve the 'Pineapple Upside Down' cake with fresh cream, custard, milk-shake, juice or tea.
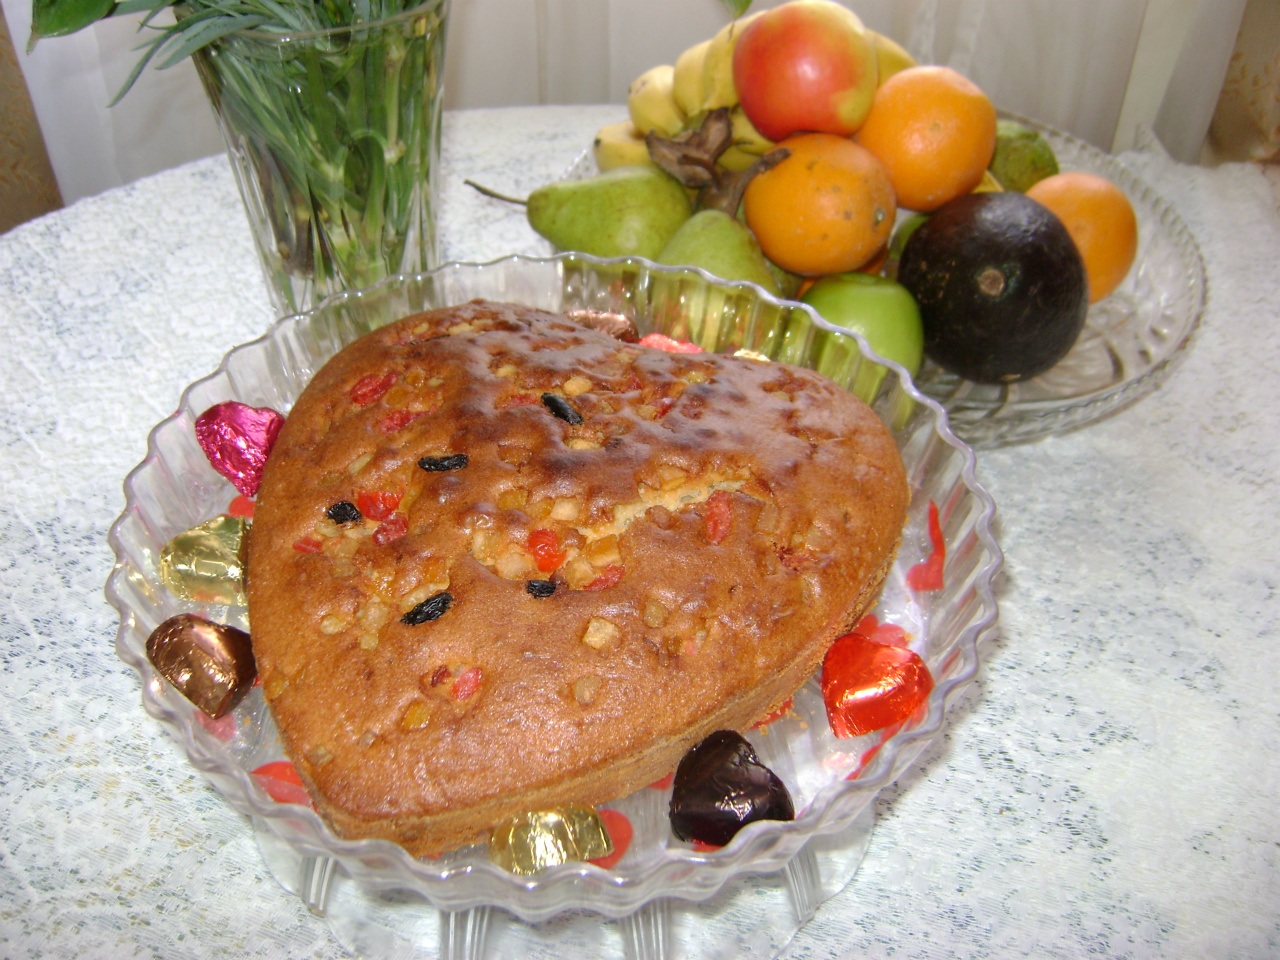
Serves 6 rich fruity fruit
What you need
For the Cake Mix:
3 eggs
1+1/4 cup self raising flour
3/4 cup melted margarine
1/2 cup soft brown sugar
2 tablespoons milk
For the Fruit:
1/4 cup chopped, candied red cherries
1/4 cup black currants
1/4 cup raisins
1/2 cup candied mixed peel [orange+lemon]
1 tablespoon dry flour
For preparing the baking tin:
A 25 cm cake tin, any shape
1 tablespoon margarine
2 tablespoons dry flour
For preparing the Oven:
Preheat for 10 minutes at 180 degrees C
Keep wire rack in the middle level of the oven
Place a metal bowl of water at base of oven to preserve the moisture in the cake.
Rich Fruity Fruit
How to
Steps:
1. In a large bowl, mix the margarine and the sugar with a wooden spoon.
2. Add the eggs one at a time and mix.
3. Add the milk and mix.
4. Put in the flour a little at a time and mix thoroughly for at least ten minutes so that you have a creamy mixture.
5. In a separate small bowl mix all the fruit with the dry flour. This will prevent the fruit from sinking to the bottom of the cake - it will be spread evenly. Remove one tablespoon of this and keep it aside to sprinkle on top of the cake.
6. Put the floured fruit into the cake mixture and gently mix it with a fork.
7. Prepare the baking tin by smearing the inner surface with the margarine and dusting it with the dry flour.
8. Pour the cake mixture into the tin and even out the surface with a spatula, depressing the middle to allow equal rising of the cake.
9. Sprinkle the saved fruit from step 5 over the top of the cake.
10. Bake the cake at 180 degrees C for 1 hour.
11. Check that the top of the cake is well browned and when you pierce it with a skewer, this comes out dry.
12. Remove from the oven and let it cool for at least 30 minutes.
13. Carefully ease out the cake and place it onto a flat dish that can be covered to preserve the freshness of the cake.
14. Serve this 'Rich Fruity Fruit' cake with tea, coffee, milk-shake or juice.

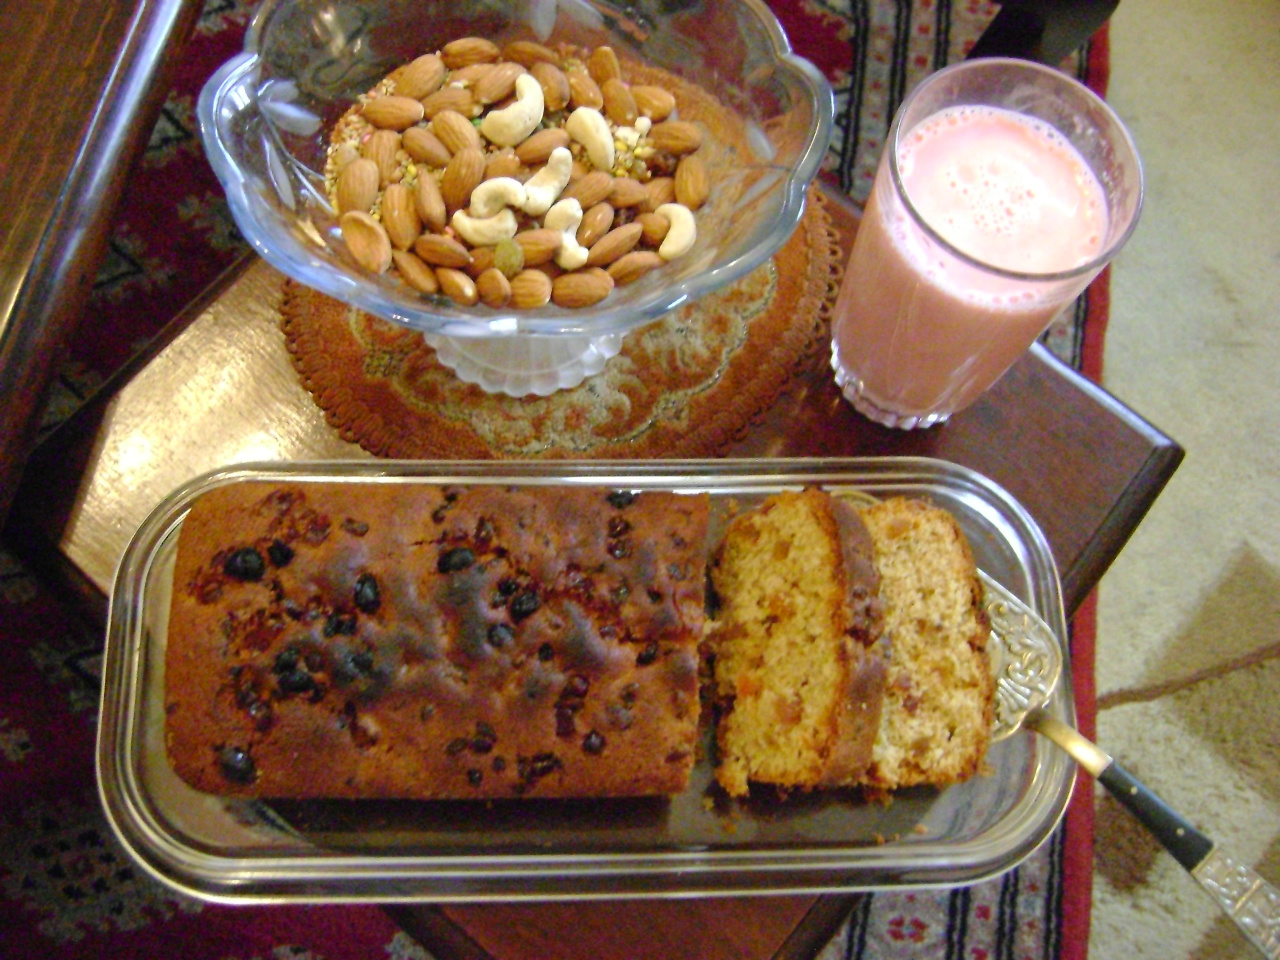
Serves 12 pieces brown fruit cups
What you need
For the Cake Mix:
1 cup melted margarine
3/4 cup soft brown sugar
3 eggs
1 heaped cup whole meal flour
1 heaped teaspoon baking powder
2 tablespoons milk
1 cup mixed fruit [ black currants, raisins, candied peel and cherries]
For preparing the baking tray
1 tray with 12 circular depressions
12 paper cups, medium size
For the Oven:
Preheat at 180 degrees C for at least 10 minutes
Keep the wire rack in the middle level of the oven
A small metal bowl with water placed at base of oven to preserve the moisture of the cakes
Brown Fruit Cups
How to
Steps:
1. In a big bowl, mix the margarine and the sugar with a wooden spoon.
2. Add the eggs, one at a time, and mix.
3. Add the milk and mix.
4. Add the flour and the baking powder and mix thoroughly for at least 10 minutes till you have a creamy mixture.
5. Add the fruit mix and gently stir in with a fork.
6. Place one paper cup in each of the depressions in the baking tray.
7. Carefully use a spoon to put the cake mixture in each of the paper cups.
8. See that each paper cup is only 2/3 full to allow for the rising of the cakes.
9. Place the baking tray on the wire rack in the oven and bake at 180 degrees C for 30 to 40 minutes.
10. Check that the cakes are browned and when you pierce one with a skewer this comes out dry.
11. Remove from the oven and allow to cool for 10 minutes.
12. Ease out the cakes with the paper cups in tact and place on a serving dish.
13. Serve the 'Brown Fruit Cups' with tea. coffee, milk-shake or juice.
Serves 6 kashmiri gateau
What you need
For the Cake Mix:
1 cup melted margarine
1/2 cup soft brown sugar
3 eggs
3 tablespoons milk
1 cup self raising flour
For the Kashmiri touch:
1/2 cup walnuts, coarsely crushed
1/4 cup dry figs, soaked for 15 minutes, drained and cut into small pieces
1/4 cup dry apricots, soaked for 15 minutes, drained and cut into small pieces
1/4 cup raisins
1/4 cup black currants
1 tablespoon coarsely crushed almonds
1 tablespoon coarsely crushed cashew-nuts
For preparing the Baking Tin:
A 25 cm cake tin of any shape
1 tablespoon margarine
2 tablespoons dry flour
For preparing the Oven:
Preheat for 10 minutes at 180 degrees C
Keep the wire rack in the middle level of the oven
Place a small metal bowl of water at the base of the oven to preserve the moisture of the cake
Kashmiri Gateau
How to
Steps:
1. In a large bowl, mix the margarine and the sugar with a wooden spoon.
2. Add the eggs, one at a time, and mix.
3. Add the milk and mix.
4. Add the flour, a little at a time and mix thoroughly for at least 10 minutes till you have a creamy mixture.
5. Add all the Kashmiri fruits and nuts. Stir in gently with a fork.
6. Prepare the baking tin by smearing its inner surface with the margarine and sprinkling the dry flour all over it.
7. Pour the cake mix into the baking tin, leveling it with a fork and making a slight depression in the middle to allow for the even rising if the cake.
8. Place into the oven and bake at 180 degrees C for 1 hour.
9. Check that the cake is golden brown and when you pierce it with a skewer, this comes out dry.
10. Remove from the oven and let it cool for at least 20 minutes.
11. Carefully ease out the cake and place it on dish which should be covered immediately with cling film to keep the cake fresh and moist.
12. Serve the 'Kashmiri Gateau' with Kashmiri (Green) tea, coffee, milk-shake or juice.
Serves 6 coconut chunk
What you need
For the Cake Mix:
3 eggs
1 cup melted margarine
3/4 cup castor sugar
1 cup fine semolina [sooji]
1 heaped teaspoon baking powder
1/2 cup desiccated coconut
2 tablespoons milk
For preparing the Baking Tin:
A 25 cm any shaped cake tin
1 tablespoon margarine
2 tablespoon dry flour
For preparing the Oven:
Preheat for at least 10 minutes at 180 degrees C
Keep wire rack in the middle level of the oven
Place a small metal bowl of water on the base of the oven to conserve the moisture in the cake
Coconut Chunk
How to
Steps:
1. In a large bowl, mix the margarine and the sugar with a wooden spoon.
2. Add the eggs, one at a time, and mix.
3. Add the semolina and the baking powder and mix thoroughly for 10 minutes so that you have a creamy mixture.
4. Add the coconut and the milk. Mix well.
5. Prepare the baking tin by smearing its inner surface with the margarine and sprinkling the dry flour all over it.
6. Pour the cake mix into the tin and make the top smooth with a spatula, depressing the middle a bit to allow even rising of the cake.
7. Bake for 1 hour at 180 degrees C.
8. Check that the cake is browned and when you pierce it with a skewer, this comes out dry.
9. Remove the cake from the oven and let it cool for 15 minutes.
10. Ease it out and place it on a cake dish. Keep it covered with cling film to preserve the freshness of the cake.
11. Serve the 'Coconut Chunk' Cake with tea, coffee, milk-shake or juice.
Serves 12 pieces queen cuties
What you need
For the Cake Mix:
3 eggs
1 cup self raising flour
1/2 cup castor sugar
3/4 cup melted margarine
1 tablespoon milk
For the Baking:
1 baking tray with 12 circular or any other shaped depressions.
12 medium sized paper cups
For preparing the Oven:
Preheat for 10 minutes at 180 degrees C
Place wire rack in the middle level of the oven
Keep a small metal bowl with water at the base of the oven to preserve the moisture in the cakes.
For the Decoration of the Cakes:
1 tablespoon icing sugar
1/2 teaspoon water
12 'smartie' sweets
1 tablespoon chocolate syrup
1 teaspoon chocolate sprinkle
1 teaspoon rainbow sprinkle
Queen Cuties
How to
Steps:
1. In a large bowl, mix the sugar and the margarine with a wooden spoon.
2. Add the eggs, one at a time, and mix.
3. Add the flour, a little at a time, and mix.
4. Add the milk and mix thoroughly for at least ten minutes so that you have a creamy mixture.
5. Place a paper cup in each of the depressions in the baking tray.
6. With a spoon, carefully put the cake mix into each paper cup till it is two thirds full. This will avoid spilling over when the cakes rise.
7. Place the baking tray in the oven and bake for 30 to 40 minutes.
8. Check that the cakes are golden brown and when you pierce one with a skewer, this comes out dry.
9. Remove the tray from the oven and let it cool down for 15 minutes.
10. Ease out the paper cups with the cakes and place them on a flat dish. Let them cool for another 15 minutes.
11. In a small bowl, mix the icing sugar and the water and spread it over 4 of the queen cakes. Place 3 'smartie' sweets on each of these cakes.
12. Spread a little chocolate syrup on each of the other 8 queen cakes.
13. Over 4 of them put some chocolate sprinkles and over the other 4, put the rainbow sprinkles.
14. Serve the delightfully decorated 'Queen Cuties' with tea, coffee, milk-shake or juice.
Serves 16 pieces pan drops
What you need
For the Batter:
1 egg
1/2 cup sugar
1/2 cup warm milk
1 cup self raising flour
1 teaspoon fennel seeds [saunf]
2 tablespoons raisins
For the shallow frying:
A non-stick broad frying pan
1/2 cup cooking oil
Pan Drops
How to
Steps:
1. In a bowl, whisk the egg and add the sugar.
2. Add the flour and the milk. Mix with a fork for a couple of minutes so that you have a creamy soft but not very runny batter.
3. Add the fennel seeds and the raisins. Stir gently with the fork.
4. Put the frying pan on low heat and spread a tablespoon of oil on it.
5. Scoop one teaspoon full of the batter and place it carefully on the warm oil.
6. When it has risen, use a wooden spatula to turn it over.
7. Let it cook till both sides are golden brown. Remove and place on absorbent paper to remove ant excess oil.
8. Repeat Steps 5, 6 and 7 till you finish the batter. You can fry 5 or 6 pieces at a time but take care that they do not stick to each other and spoil the shape!
9. Place the fried pan cakes onto a flat dish.
10. Serve the 'Pan Drops' with tea, coffee, milk-shake or juice.

Serves 12 pieces do nuts
What you need
For the 'Dough'
1 egg
1 cup self raising flour
1/4 cup sugar
1/4 cup milk
For preparing the baking dish:
A baking tray with 12 Do-nut mould depressions
2 tablespoons margarine
2 tablespoons dry flour
For preparing the Oven:
Preheat the oven at 180 degrees C for 10 minutes
Keep the wire rack in the middle of the oven
Place a small metal bowl of water on the base of the oven to preserve the moisture of the do-nuts
For the Decoration:
1 tablespoon icing sugar
1 tablespoon red fruit jam
1 tablespoon desiccated coconut
1 tablespoon chocolate syrup
1 tablespoon chocolate sprinkles
1 tablespoon rainbow sprinkles
Do-Nuts
How to
Steps:
1. In a bowl, beat the egg and add the sugar.
2. Add the milk and mix with a wooden spoon.
3. Add the flour, a little at a time, and mix for 5 minutes till you have a creamy, thick batter.
4. Prepare the baking tray by smearing margarine in each of the depressions/moulds and dusting the dry flour onto the surface.
5. With a spoon put some of the batter into each mould up to two thirds of the cavity to prevent spilling over and allow for the rising of the do-nuts.
6. Place the baking tray in the preheated oven and bake at 180 degrees C for 15 minutes.
7. Check that the do-nuts are golden browned.
8. Remove from the oven and cool for 5 minutes.
9. Ease out each do-nut carefully from the mould and place on a flat dish.
10. On two of the do-nuts, sprinkle the icing sugar; on the next two, spread the jam and sprinkle with the coconut.
11. On six of the do-nuts, put the chocolate syrup. On two of these, spread the chocolate sprinkles; on the next two spread the rainbow sprinkles and leave the other two with only the chocolate syrup.
12. Leave the last two do-nuts plain. Now you will have the do-nuts with assorted decorations.
13. Serve the delightful looking 'Do-nuts' with tea, coffee, milk-shake or juice.

Serves 12 pieces orange pan cakes
What you need
For the batter:
1 egg
1/2 cup sugar
1/4 teaspoon salt
1/2 cup orange juice
1+ 1/4 cup self raising flour
2 tablespoons candied orange peel
For shallow frying:
A non-stick broad frying pan
1/2 cup cooking oil
Orange Pan Cakes
How to
Steps:
1. In a bowl beat the egg.
2. Add the sugar, salt and the juice. Mix with a fork.
3. Add the flour, a little at a time, and mix well to get a creamy, thick but slightly runny batter.
4. Add the orange peel and stir gently with the fork.
5. Keep the frying pan on low heat. Put a tablespoon of oil on it.
6. With a tablespoon scoop some batter and place it carefully on the warm oil so that it retains a circular shape.
7. Let it brown on one side and then turn it over to cook the other side. With a wooden spatula, push it to the edge of the pan to brown.
8. Remove and place the browned pan-cake on an absorbent paper to drain off any excess oil.
9. Repeat Steps 6, 7 and 8 till you finish the batter.
10. Serve the 'Orange Pan Cakes' with tea, coffee, juice or milk shake.
Serves 6 wafer pan cakes
What you need
For the Batter:
1 egg
1 cup self raising flour
1 cup warm milk
1/4 cup warm water
For the shallow Frying:
A flat non- stick, medium sized frying pan.
4 tablespoon margarine.
2 teaspoons sugar
For the topping/filling:
1 tablespoon honey
1 tablespoon fruit jam
1 tablespoon chocolate syrup
1 tablespoon caramel syrup
Wafer Pan Cakes[crepes]
How to
Steps:
1. In a bowl, beat the egg with a fork.
2. Add the milk and mix.
3. Add the flour and mix.
4. Add a little water at a time and mix till you have a creamy, runny batter.
5. Place the frying pan on low heat and put 1 tablespoon of margarine on it and let it melt all over the pan.
6. Carefully pour some of the batter onto the frying pan so that you have a thin layer spread all over the surface of the pan.
7. Sprinkle 1/4 teaspoon sugar over the layer of batter. This will give a caramel brown colour to the pan cake.
8. When one side is cooked, carefully turn it over so that it does not break and let it brown.
9. Remove it and place it on a flat plate.
10. Repeat the Steps 6, 7, 8 and 9 till the batter is over. You will be able to make at least 4 pan cakes.
11. On one pan-cake you can spread honey, on the next, put the jam, on the third one you can spread the chocolate syrup and on the last one put the caramel syrup.
12. You can roll each pan cake or keep them open.
13. Serve the 'Wafer Pan Cakes' for breakfast or brunch with tea, coffee, juice or milk-shake.
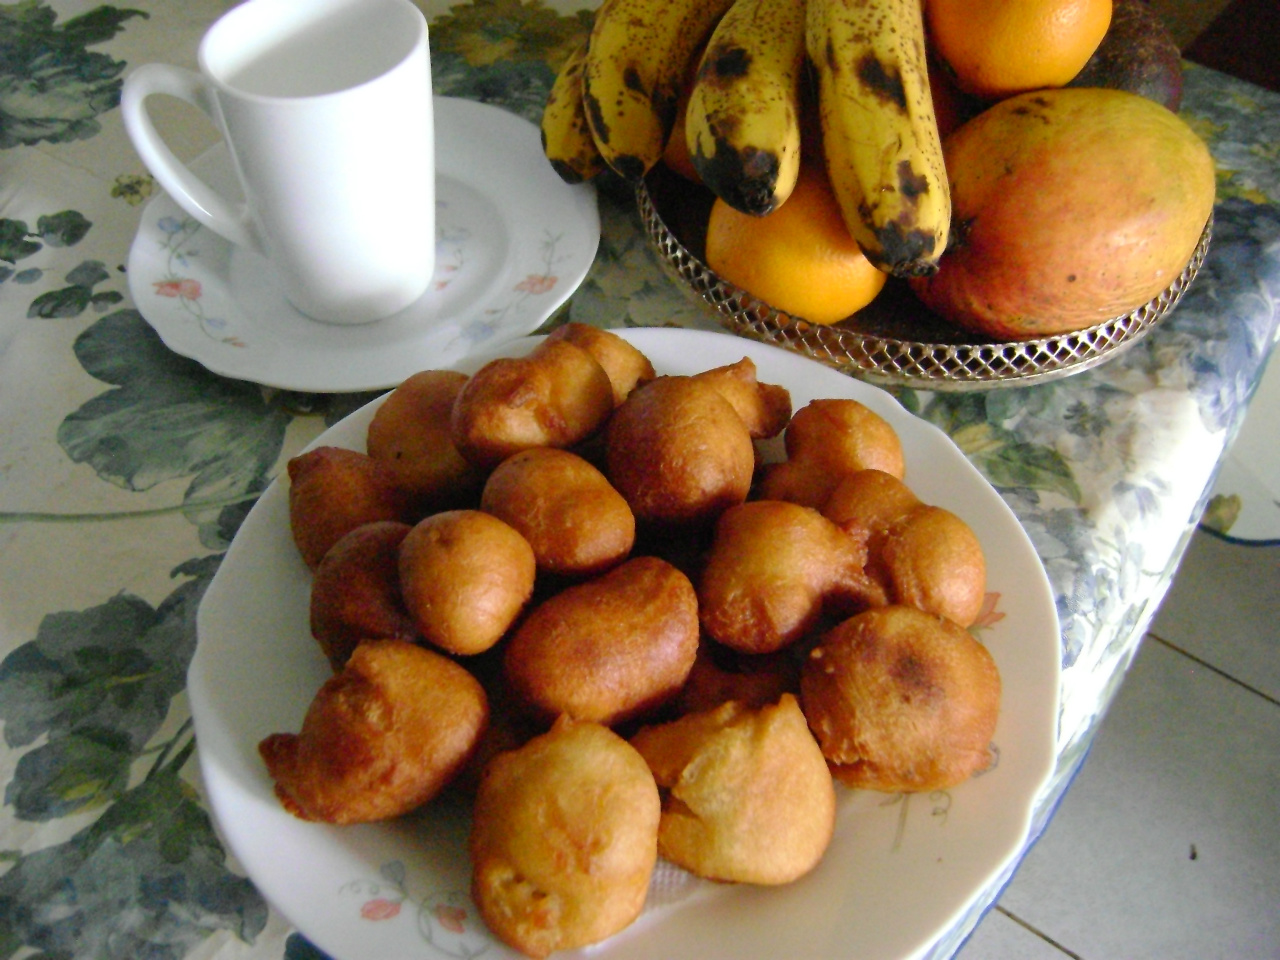
Serves 20 pieces gulguley
What you need
For the batter:
2 cups self raising flour
2 eggs
1/2 cup milk
1/2 cup sugar
4 elachi [cardamom]seeds, crushed
For deep frying:
1/2 litre fresh cooking oil
Gulguley
How to
Steps:
1. In a bowl,beat the eggs thoroughly.
2. Add the sugar and mix.
3. Add the milk and stir.
4. Little at a time, add the flour and mix with a spoon, ensuring that there are no lumps.
5. In a deep frying pan, put the oil at medium heat.
6. Take the batter, a spoonful at a time and tip carefully into the warm oil.
7. You can make 6 pieces at a time. Let them become golden brown on one side and then turn them over so that both sides are cooked.
8. Remove the fried pieces and put them on absorbent paper to drain out excess oil.
9. Repeat Steps 6 to 8 till your batter is finished.
10. Serve the 'Gulguley' with tea, coffee, milkshake or juice.
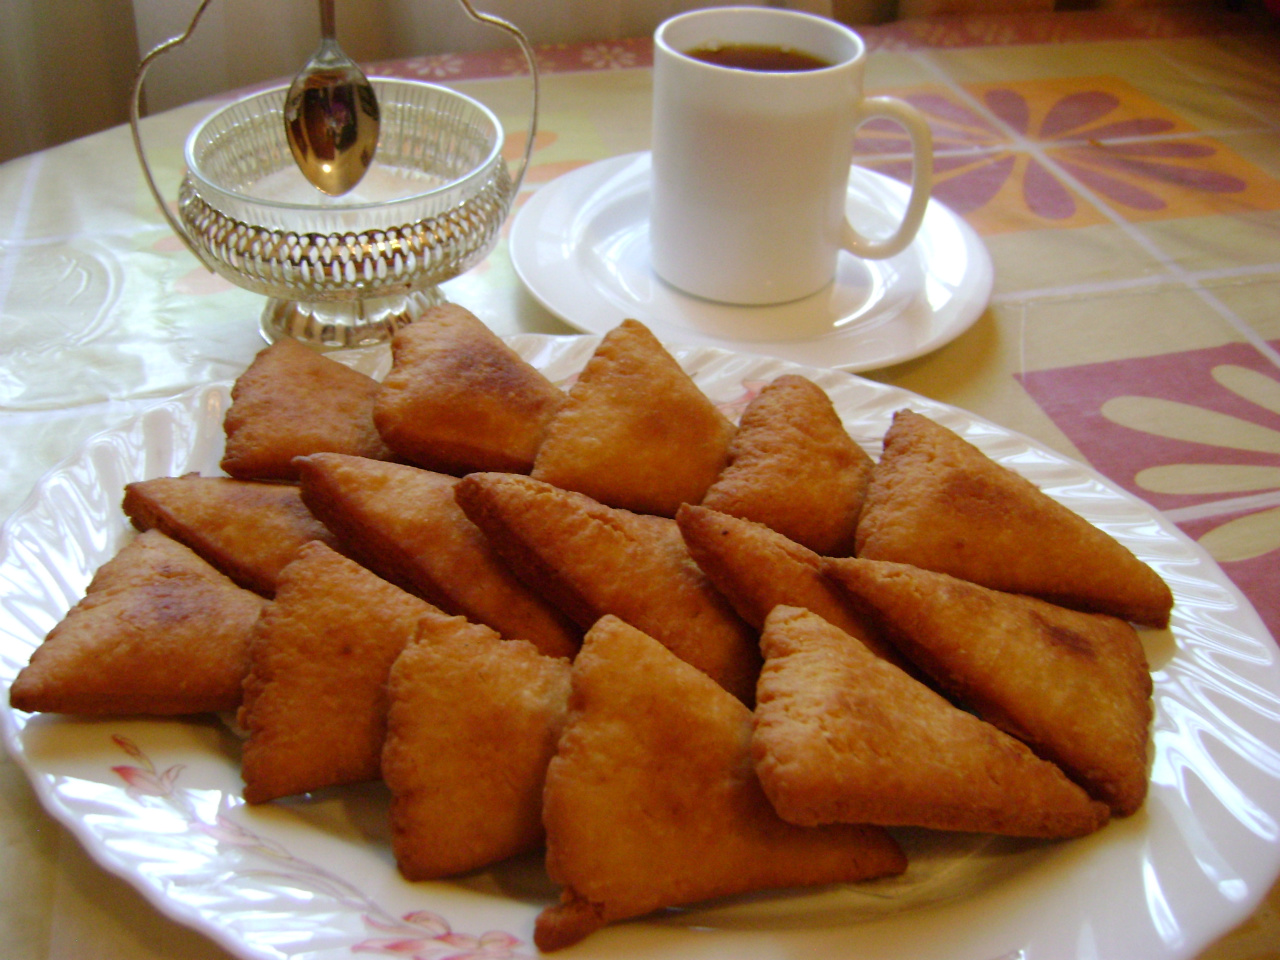
Serves 30 pieces mandazi
What you need
For the Dough:
4 cups self raising flour
1 1/2 cups coconut milk
1/2 cup sugar
For deep frying:
1/2 litre fresh cooking oil
Mandazi
How to
Steps:
1. In a large bowl, place the self raising flour.
2. Add the sugar and mix.
3. Slowly add the coconut milk, a little at a time and with you hand press into a soft, pliable dough.
4. Cover the dough with a cloth and leave it aside for 15 minutes.
5. Divide the dough into 4 parts.
6. Take one part and with your hand make it into a ball.
7. Put the ball on a flat surface and with a rolling pin, flatten it into a circle of diameter 20 cm and thickness of 0.5 cm.
8. With a knife cut the circle into half, then quarters and finally make 8 equal 'triangles'.
9. Repeat Steps 6 to 8 so that you have all the pieces ready.
10. In a deep frying pan, warm the oil on medium heat.
11. Take one piece at a time and carefully place into the warm oil.
12. You can put 6 pieces at a go. Let them get cooked and become golden brown on one side.
13. Turn them over and let the other side also become brown.
14. Remove and place on absorbent paper to drain off any excess oil.
15. Repeat steps 11 to 14 till all the pieces have been fried.
16. Serve the 'Mandazis' with tea, coffee, milk shake or juice.
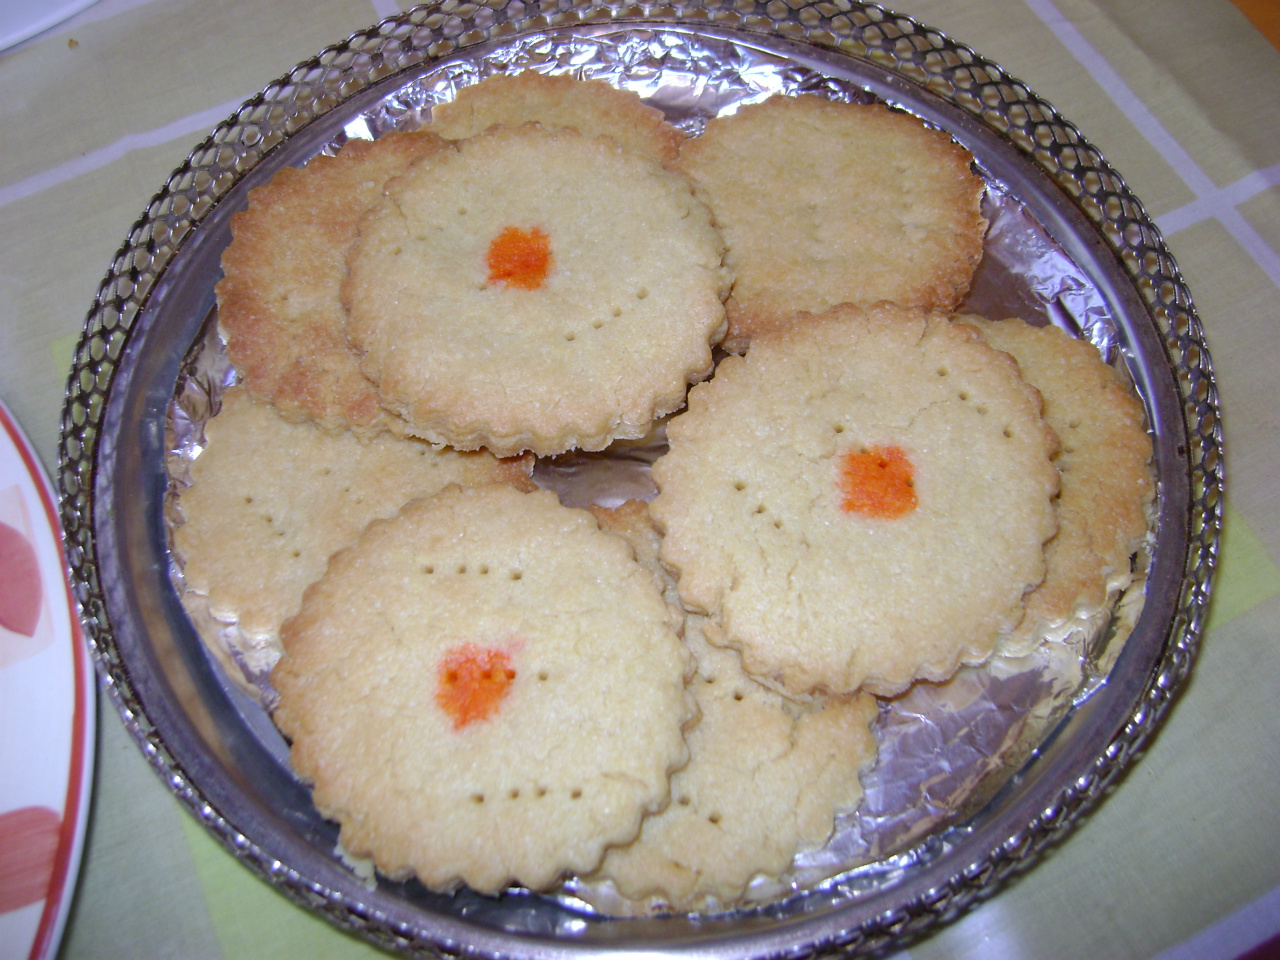
Serves 40 pieces naan khataai
What you need
For the dough:
2 cups castor sugar
2 cups melted margarine
4 cups self raising flour
1 cup fine gram flour [besan]
1/4 cup fine semolina [sooji]
2 teaspoons kitchen bicarbonate of soda
For the decoration:
1 tablespoon water
1 pinch orange food colour powder
For preparing Baking Dish:
1 teaspoon margarine
1 table spoon dry baking flour
[alternatively you could just use baking paper]
Naan Khataai
How to
Steps:
1. In a large basin, place the flour, the 'besan' and the 'sooji.
2. Add the sugar and the bicarbonate soda. Lightly mix all the dry ingredients together.
3. In the middle of the mixture make a depression and pour in the margarine.
4. With your fingers, mix and quickly knead the ingredients with the margarine till you get a pliable, smooth dough.
5. With your hands divide the dough into 40 parts and shape into balls.
6. Using your fingers or a pastry shape cutter, flatten the balls into discs of 4 cm diameter and 0.5 cm thickness.
7. Preheat the oven at 170 degrees C. for ten minutes
8. Prepare the baking tray by rubbing the margarine on the surface and sprinkling the dry flour on it. [Or just line the tray with the baking paper]
9. Place a few of the discs [as many as can fit] on your prepared baking tray, keeping them at least 2 cm apart.
10. Using a fork, make two or three prong marks on the discs.
11. Place the baking tray in the pre-heated oven and let the discs cook for 15 to 20 minutes till they are just golden.
12. Remove the tray from the oven and ease out the discs with the help of a spatula and place on a tray to cool.
13. In a small bowl, mix the food colour into the water.
14. Using a 'dropper' or your index finger, make a large orange dot in the middle of each disc. Let it dry.
15. Repeat steps 9 to 14 till all the discs are ready.
16. Let them cool thoroughly before you store them in an air-tight container.
17. Serve the 'Naan Khataais' with tea, coffee, milk-shake or juice.

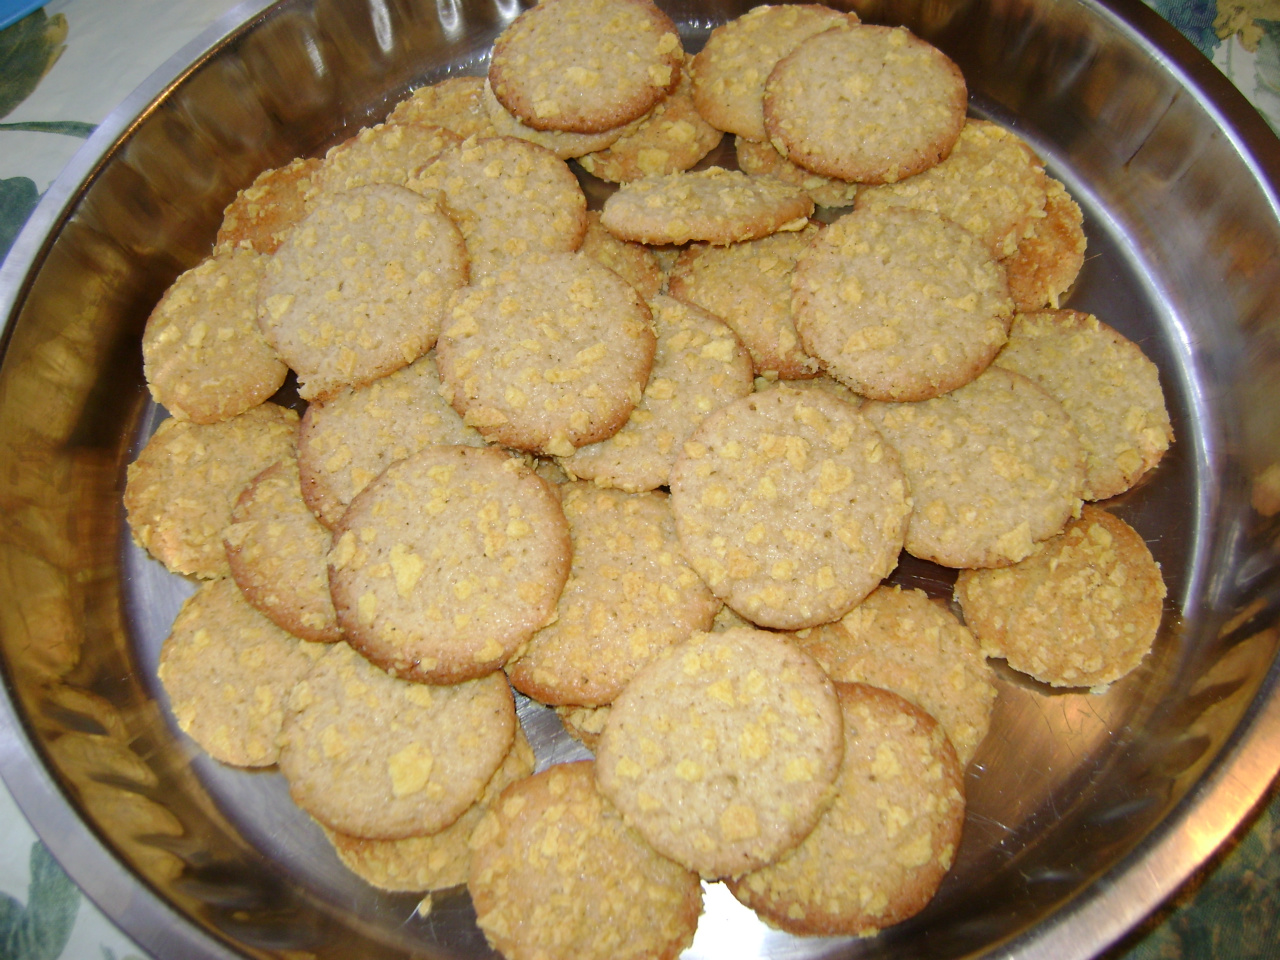
Serves 40 pieces corn flake cookies
What you need
For the Dough:
2 cups self raising flour
1 cup icing sugar
3/4 cup melted margarine
1 whole egg, well beaten
For the coating:
1 cup coarsely crushed corn flakes
For preparing baking tray:
1 teaspoon margarine
1 tablespoon flour
{Or just use 'baking paper'}
Corn-flake Cookies
How to
Steps:
1. In a large bowl, place the flour and the margarine. Mix with you fingers till crumbly.
2. Add the sugar and mix.
3. Add the beaten egg and mix thoroughly all the ingredients.
4. Using you hands, make 40 small, smooth balls of the dough.
5. In a dry tray, place the crushed corn flakes.
6. Pre-heat the oven at 180 degrees C. for 10 minutes.
7. Prepare the baking tray by smearing the surface with the margarine and sprinkling the dry flour over it. [ Or just line the baking tray with the paper.]
8. Take one ball of the dough at a time and roll it lightly on the corn flakes so that it gets coated all over.
9. Place it on the baking tray. Add as many more coated balls as can fit on the tray. They should be at least 5 cm apart as they flatten into discs.
10. Put the tray in the oven and allow to bake for 15-20 minutes till they are just golden.
11. Remove the tray from the oven and ease out each disc with a spatula while still warm - otherwise they will crack. Place on a plate to cool down.
12. Repeat steps 7 to 11 till you have baked all the cookies.
13. After they have cooled down completely you may store them in an air-tight container.
14. Serve the 'Corn-Flake Cookies' with tea, coffee, milk-shake or juice.
Serves 50 pieces coconut buns
What you need
For the Dough:
2 cups self raising flour
3/4 cup melted margarine
1 cup castor sugar
2 cups desiccated coconut
1 whole egg, well beaten
1/2 cup milk
For preparing Baking Tray:
1 teaspoon margarine
1 tablespoon dry flour
[Or just use baking paper]
Coconut Buns
How to
Steps:
1. In a large bowl, place the flour and the margarine. With your fingers, rub together so that it becomes crumbly.
2. Add the sugar and the coconut and mix well.
3. Add the beaten egg and the milk. Knead lightly so that you get a soft, pliable dough.
4. Divide the dough into 50 parts and roll each into a smooth, round ball.
5. With a knife make a criss-cross in the middle of each ball - this will flatten it slightly.
6. Pre-heat the oven at 180 degrees C. for 10 minutes.
7. Prepare the baking tray by smearing it with margarine and sprinkling the dry flour over the surface. [ Or line the tray with the baking paper ]
8. Place the criss-crossed balls [as many as can fit] on the baking tray so that they are at least 5 cm apart to allow for their 'rising'.
9. Place the tray into the oven and allow to bake for 15 - 20 minutes till just golden.
10. Remove from the oven and with the help of a spatula, ease out the buns onto a plate. Let them cool down.
11. Repeat steps 7 to 10 till all the buns are done.
12. When they have cooled down completely, you may store them in an air tight container.
13. Serve the 'Coconut Buns' with tea, coffee, milk-shake or juice.
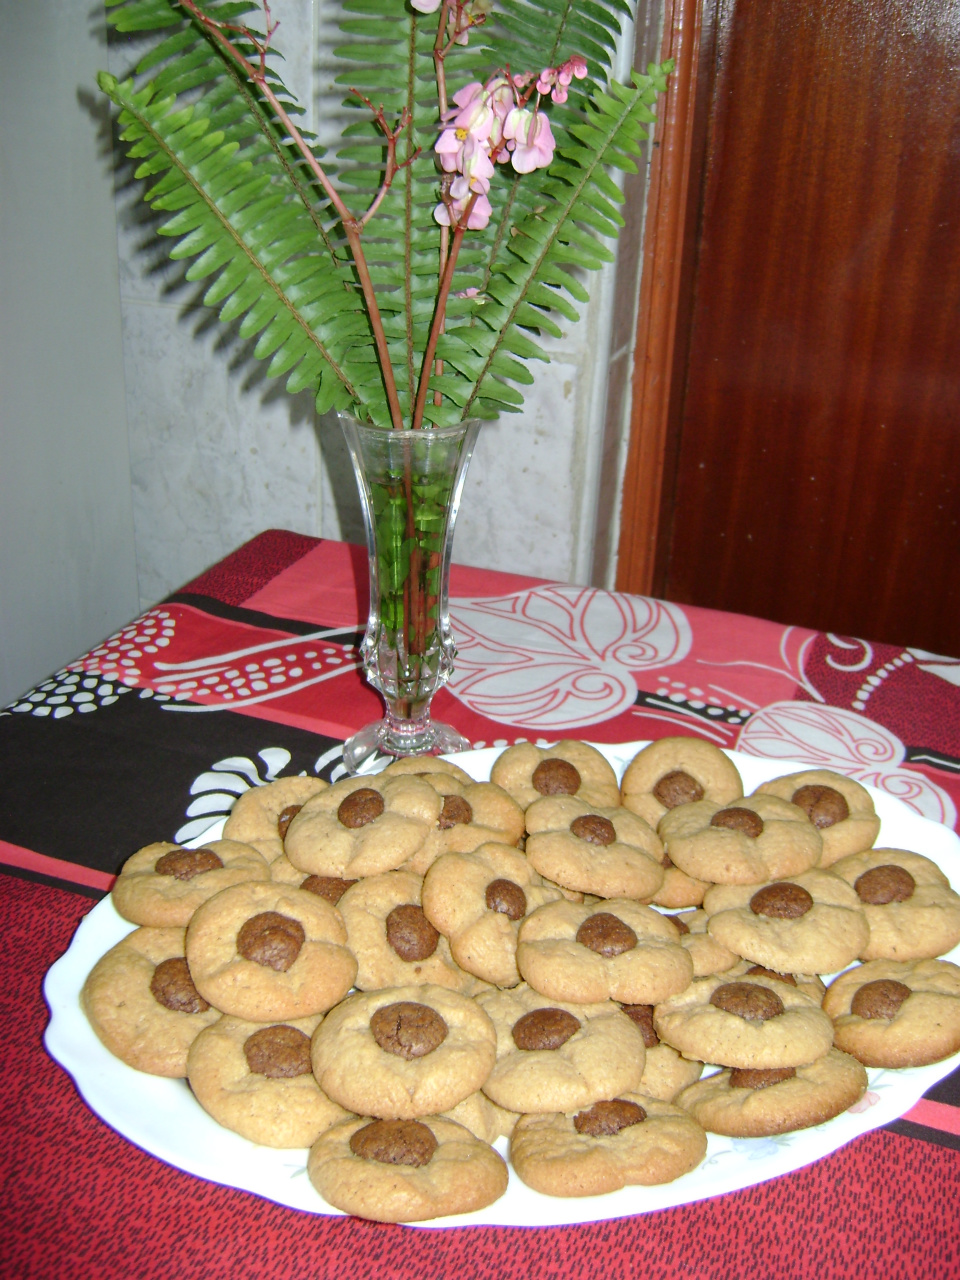
Serves 30 pieces peanut flowers
What you need
For the dough:
3/4 cup melted margarine
1 and 1/4 cup castor sugar
1 whole egg, well beaten
1/2 cup smooth peanut butter
1 teaspoon vanilla essence
1 and 1/2 cup plain white flour [maida]
2 tablespoons drinking chocolate powder
For preparing Baking Tray:
1 teaspoon margarine
1 tablespoon dry flour
[Or just use 'baking paper']
Peanut Flowers
How to
Steps:
1. In a large bowl, put the sugar and the margarine. With a wooden spoon, cream them together until smooth, light and soft.
2. Add the beaten egg and mix.
3. Add the peanut butter and the vanilla essence. Mix well.
4. Add the flour, little at a time and mix with your hand till the mixture leaves the sides of the bowl.
5. Remove 1/4 cup of the mixture and put it in a small bowl. Add the chocolate powder to it, mix it well. With you fingers, make 30 tiny balls of 0.5 cm diameter and leave them aside.
6. Divide the rest of the dough into 30 parts and roll each one with your hands to make a marble size ball of diameter 2.5 cm. Place them on a baking sheet.
7. With a small, sharp knife, cut each ball across, as if to cut in half, but without cutting more than half way down the ball.
8. Repeat the cut at right angles to the first one so that the ball now has four segments [petals].
9. Gently ease the four petals open and in the middle of the 'flower', place the tiny chocolate ball. Press slightly. The diameter of the cookie should be now 3-4 cm.
10. Preheat the oven for 10 minutes at 180 degrees C.
11. Prepare the baking tray by smearing it with the margarine and sprinkling some flour over the surface or just lining it with the 'baking paper' which has certainly made life so much easier!
12. Carefully place the 'flowers' on the baking tray, 5 cm apart to allow for expansion.
13. Place the tray onto the middle rack of the oven and let it cook for 15 - 20 minutes until the 'petals' are golden brown.
14. Remove the tray from the oven and with the help of a palette or spatula, ease out the cookies while still warm.
15. Place on a flat plate and allow to cool completely before storing them in an air-tight container.
16. Serve the delightful 'Peanut Flower Cookies' with tea, coffee, juice or milkshake.
Serves 20 pieces lemon buns
What you need
For the Dough:
2 cups self raising flour
1/2 cup melted margarine
3/4 cup sugar
1 whole egg, well beaten
2 teaspoons fresh lemon juice
1/2 cup finely cut candied lemon [ or mixed ] peel
For the Topping:
1/2 cup icing sugar
2 teaspoons fresh lemon juice
1 tablespoon very finely cut candied lemon peel
For preparing the Baking Tray:
1 teaspoon margarine
1 tablespoon dry flour
{ Or use 'baking' paper}
Lemon Buns
How to
Steps:
1. In a large basin sift together the flour and margarine till crumbly.
2. Add the sugar and mix.
3. Add the peel and mix.
4. Add the egg and mix.
5. Add the lemon juice and with your hand knead into a soft, pliable dough.
6. Divide it into 20 parts and mould each part into a ball.
7. Flatten each ball into a disc of diameter 3cm. Or you may use any shaped pastry cutter to make the discs.
8. Pre-heat the oven to 180 degrees C for ten minutes.
9. Prepare the baking tray bu smearing it with the margarine and sprinkling the flour over the surface. Or you can simply line the tray with the 'baking' paper.
10. Carefully place on the baking tray as many discs as can fit with at least 3 cm in between, to allow for expansion during the cooking.
11. Bake for 15 - 20 minutes till they are golden in colour.
12. Remove from the oven and ease out each bun with the help of a spatula.
13. Place on a flat plate to cool thoroughly [at least 30 minutes].
14. Repeat Steps 9 to 13 till all the buns are ready.
15. Prepare the topping by mixing the icing sugar and the lemon juice in a small bowl. Check that there are no lumps.
16. With the help of a spoon, dot each bun with a little icing sugar mix.
17. Sprinkle the very finely cut lemon peel over the topping.
18. Allow the topping to 'set' for at least 15 minutes.
19. Serve the "Lemon Buns" with tea, coffee. milk-shake or juice.
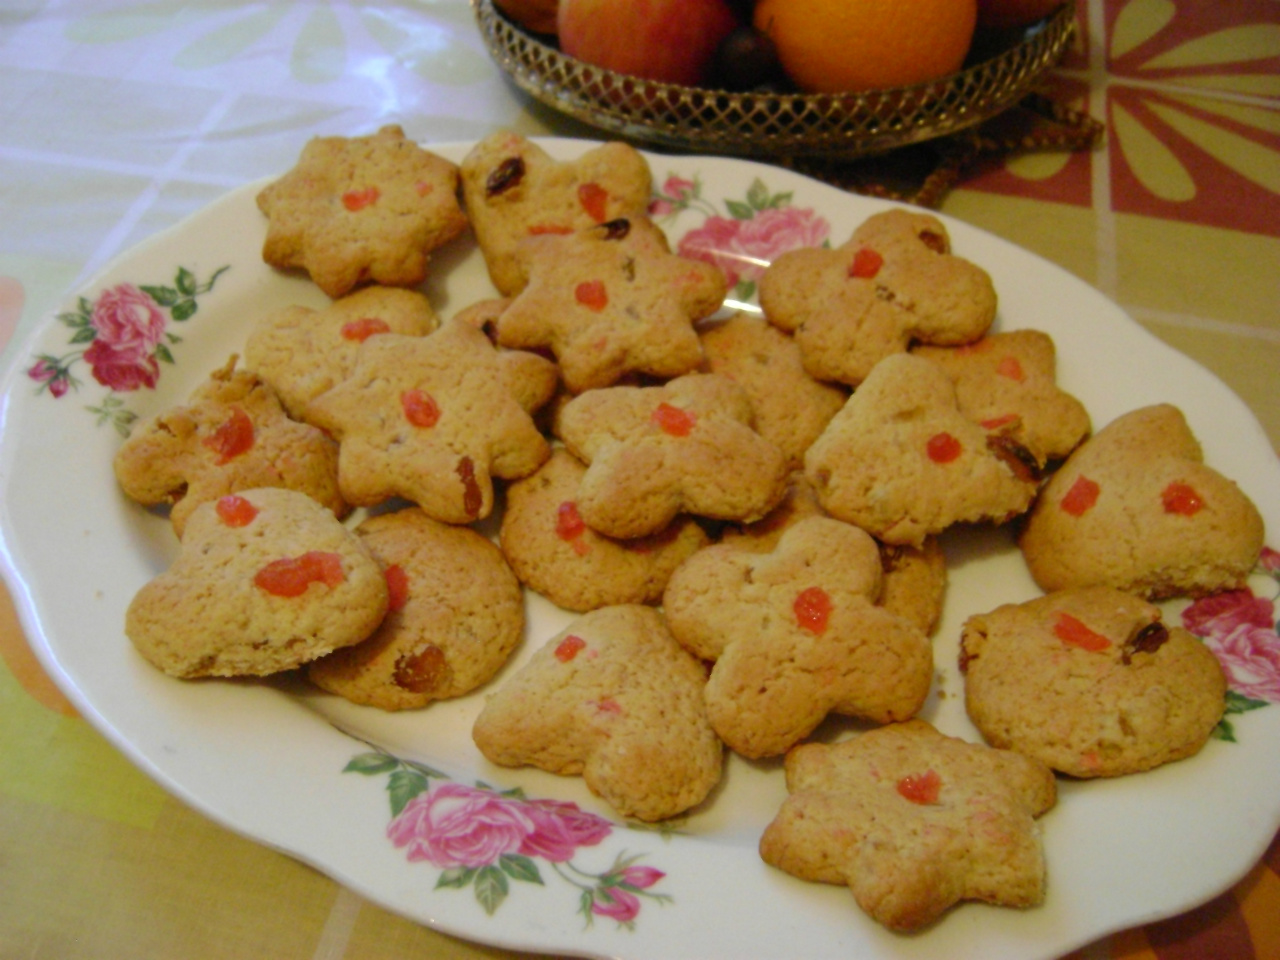
Serves 30 pieces fruit buns
What you need
For the Dough:
3 cups self raising flour
1 cup sugar
1/2 cup melted margarine
1/2 cup milk
1 cup mixed fruit: raisins, black currants, chopped candied cherries, candied orange and lemon peel
For preparing the Baking Tray:
1 teaspoon margarine
1 tablespoon dry flour
[Or use 'baking' paper']
Fruit Buns
How to
Steps:
1. In a large basin, sift together the flour and the margarine till crumbly.
2. Add the sugar and mix.
3. Add the fruit mix.
4. Add the milk and with your hand, knead into a soft pliable dough.
5. Divide the dough into 30 parts.
6. With your hands, mould each part into a ball and flatten it to make a disc of 3 cm diameter and 3/4 cm thickness. Or use a pastry cutter of any shape to make the buns.
7. Pre-heat the oven at 180 degrees C for 10 minutes.
8. Prepare the baking tray by smearing the margarine on it and then sprinkling the dry flour over the surface.
Or simply line the baking tray with some 'baking paper'
9. Carefully place the discs on the baking tray so that they are at least 3 cm apart to allow for expansion during the cooking.
10. Bake for 15 - 20 minutes till golden.
11. Remove from the oven and with the help of a spatula, ease out each bun and place on a flat plate to cool down.
12. Repeat Steps 9 - 11 till all the buns are done.
13. You may store the thoroughly cooled buns in an air-tight container.
14. Serve the "Fruit Buns" with tea, coffee, milk-shake or juice.
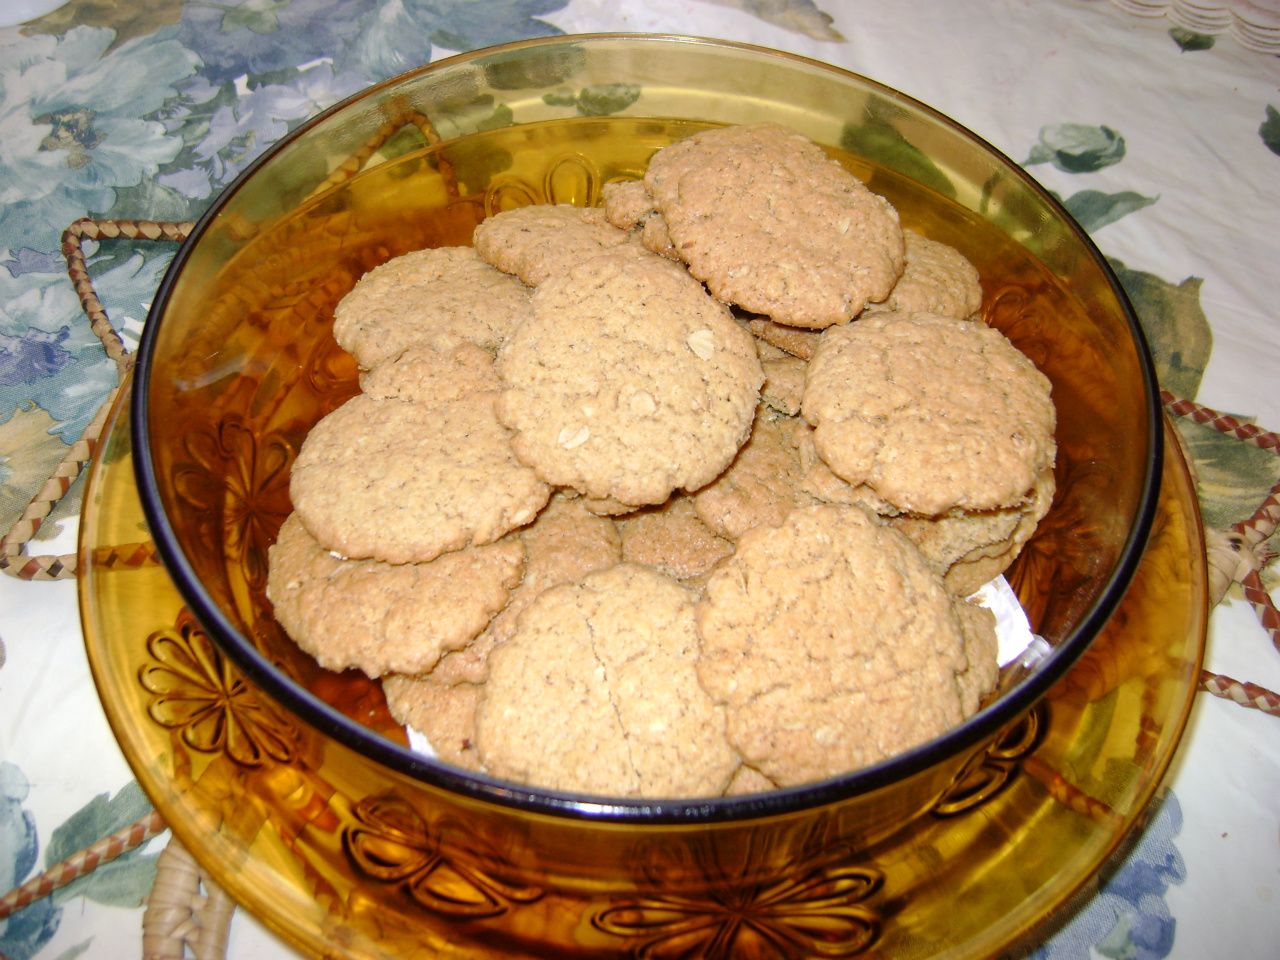
Serves 30 pieces oatmealies
What you need
For the Dough:
1 cup oat meal
1 cup brown flour
1/2 cup sugar
1/2 cup melted margarine
1/2 teaspoon cooking bicarbonate of soda
1/4 teaspoon salt
1 whole egg, well beaten
For preparing Baking Tray:
1 teaspoon margarine
1 tablespoon flour
[Or use 'Baking Paper']
Electric Oven preheated at 180 degrees C
Oatmealies
How to
Steps:
1. In a large bowl, put the margarine and flour. Rub together till crumbly.
2. Add the oatmeal and sugar. Mix.
3. Add the bicarbonate soda and the salt. Mix.
4. Add the egg and with you hand, knead till you have a stiff but pliable dough.
5. Divide the dough into 30 parts.
6. Take one part and roll it in your palms to make a ball about 2.5 cm diameter. Then softly press it into a disc of 5 cm diameter and 0.5 cm thickness. (You may use a pastry mould and cutter to get different shapes)
7. Repeat Step 6 till all the discs are ready.
8. Preheat the oven for 10 minutes at 180 degrees C.
9. Prepare the baking tray by smearing it with margarine and sprinkling the dry flour over the surface. Or simply line the tray with some 'baking paper'.
10. Place 10 to 12 discs on the tray so that they are at least 3 cm apart - they will expand while baking.
11. Place the baking tray in the middle rack of the oven and allow to cook for 15 minutes till golden brown.
12. Remove from the oven and with the help of a spatula, ease out each cookie onto a flat plate. Allow to cool.
13. Repeat Steps 9 to 12 till all the cookies are done.
14. When thoroughly cooled, you may store them in an air tight container.
15. Serve the nutritious 'Oat Mealies' with tea, coffee, milk-shake or juice.
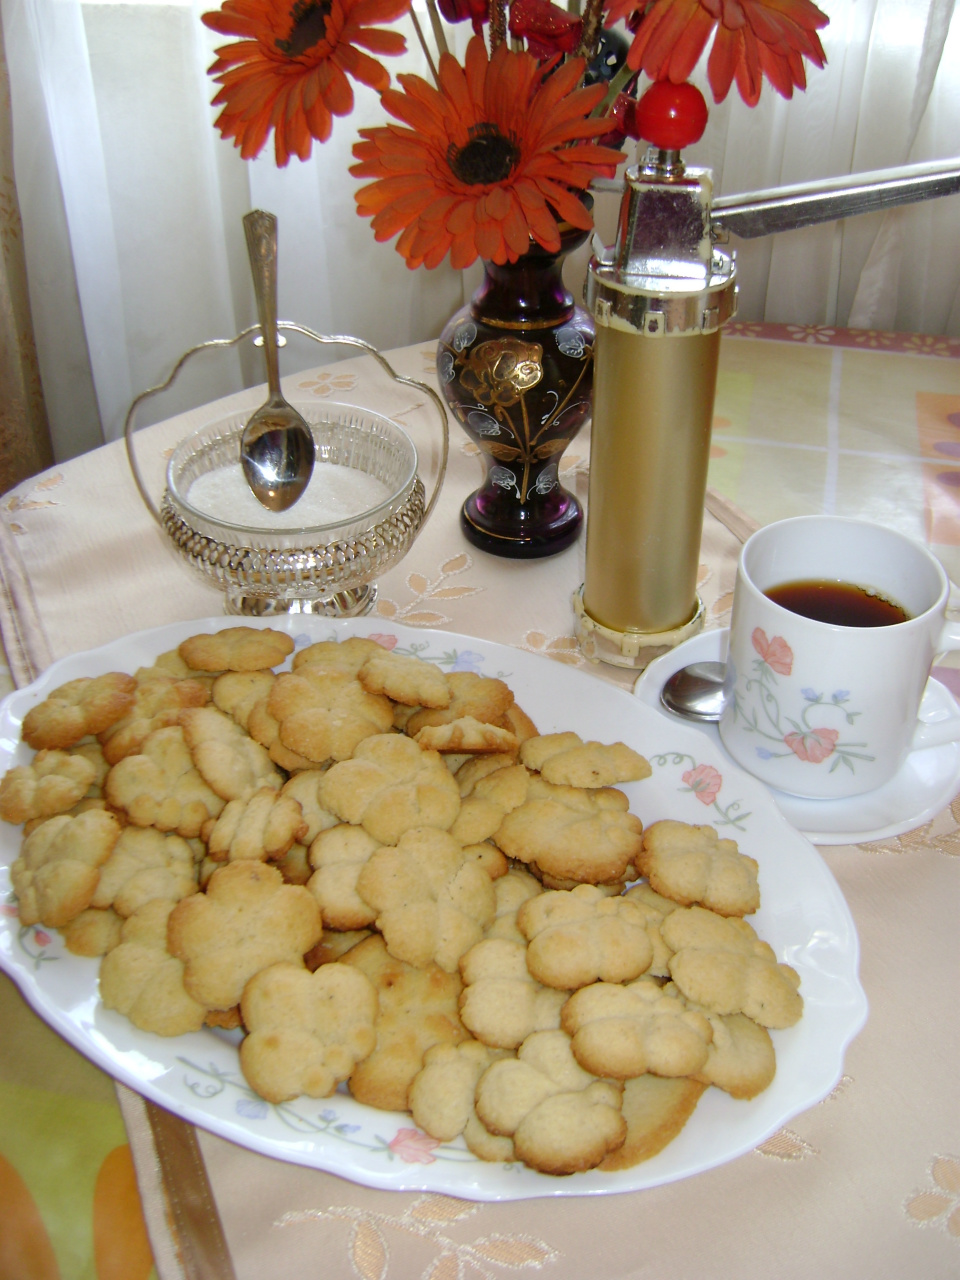
Serves 40 pieces carda mum biscuits
What you need
For the Mixture:
4 cups self-raising flour
1 and 1/4 cup melted nargarine
1 cup castor sugar
3/4 cup milk
1 teaspoon of freshly ground 'elachi' [cardamom] seeds
For Baking:
Manual Biscuit Making Machine or biscuit baking 'moulds' of different shapes
Electric Oven
Carda-Mum's Biscuits
How to
Steps:
1. In a basin, mix the margarine with the sugar.
2. Add the flour, 'elachi' and the bicarbonate soda and mix.
3. Add the milk, a little at a time and with your hand knead gently into a pliable, soft dough.
4. Preheat the oven for 10 minutes at 180 degrees C.
5. Prepare the baking tray by lining it with grease proof paper.
6. Put some dough into the 'barrel' of the Biscuit Machine and fix the disc with the shape that you want onto its base.
7. Using the Biscuit Machine carefully press out the biscuit shapes on the prepared baking tray.
8. Alternatively you may use biscuit 'moulds' to get the shapes that you like.
9. Bake the biscuits in the pre-heated oven at 180 degrees C. for 10 to 15 minutes till just golden brown.
10. Remove from the oven, allow to cool for a couple of minutes and put them on a serving tray.
11. Repeat steps 5 to 10 till you finish the dough.
12. When the biscuits are completely cold, you may store them in an air-tight container.
13. Serve the lovely 'Carda-Mum's Biscuits' with tea, coffee, milk-shake or any juice.
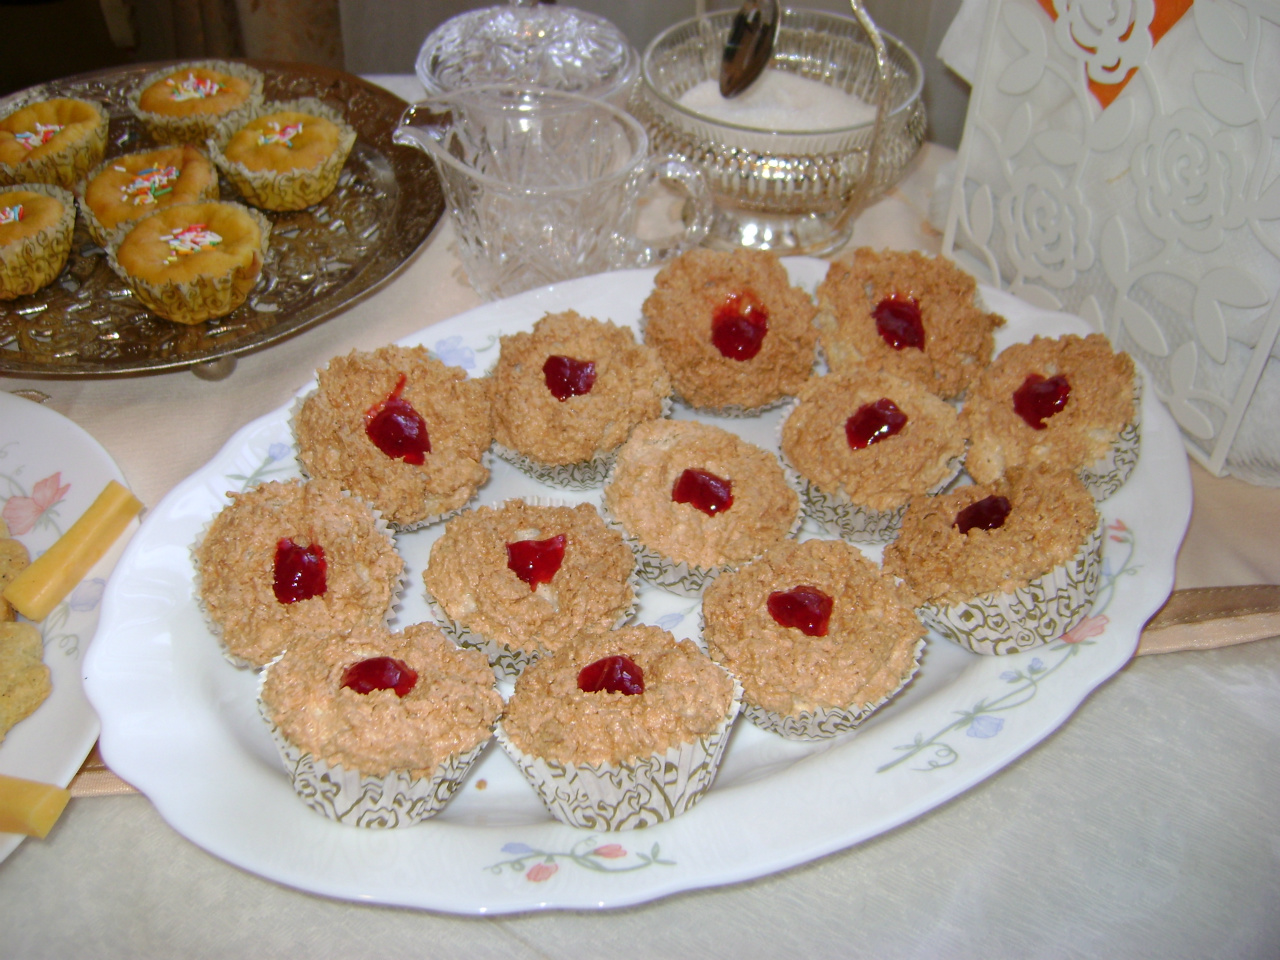
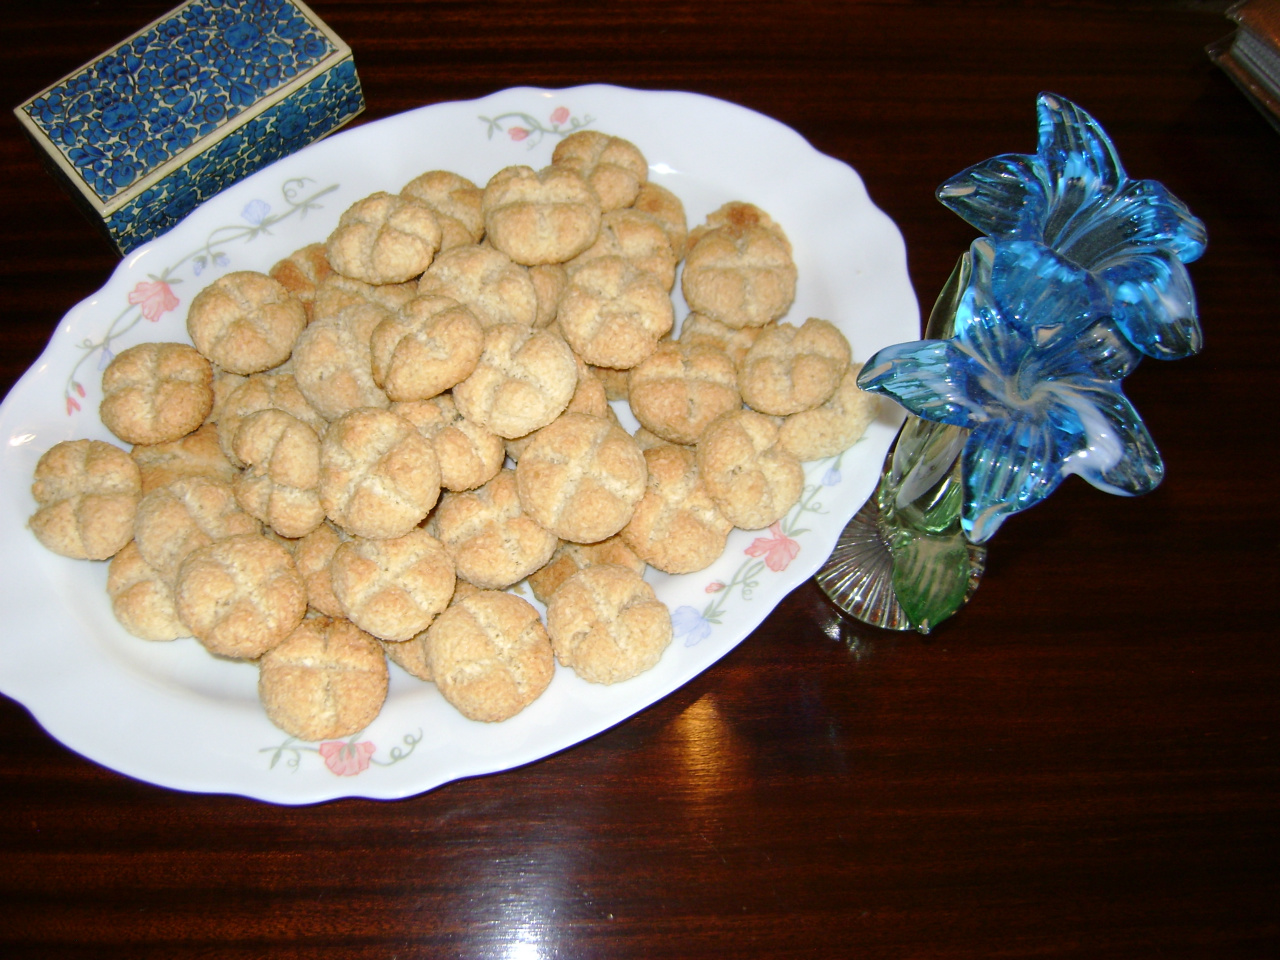
Serves 12 pieces macaroons
What you need
For the Mixture:
2 cups desiccated, unsweetened coconut powder
1 cup icing sugar
1/2 cup egg white [remove from 3 eggs]
For Baking:
Electric oven pre-heated at 150 degrees C.
12 cup cake cases/ moulds
For decoration:
1 tablespoon red fruit jam
Macaroons
How to
Steps:
1. In a bowl, put the egg whites and whisk for a minute.
2. Add the sugar and continue whisking for 5 - 10 minutes till the mixture becomes stiff and frothy.
3. Add the coconut and mix gently till the mixture is uniform.
4. Preheat the oven for 10 minutes at 150 degrees C.
5. On a baking tray, place 12 paper cup cake cases or moulds.
6. With a spoon carefully fill the cases with the mixture.
7. Using the back of a spoon make a slight depression in the middle of each case.
8. Place the baking tray in the middle rack of the oven and bake for 20 minutes till the macaroons are golden.
9. Remove from the oven and allow to cool thoroughly.
10. In the depression in the middle of each macaroon put a generous dot of the red fruit jam.
11. Place the macaroons on a serving tray.
12. Serve these marvellous 'Macaroons' with tea, coffee, juice or milk-shake.
Serves 15 pieces rice cookies
What you need
For the dough:
1 cup fine rice flour
1 egg
1/2 cup fine sugar
1/4 cup soft margarine
1/2 teaspoon baking powder
1/4 teaspoon cardamom [elachi] powder
2 teaspoons fruit juice
For Baking:
Preheated oven at 180 degree C
Baking tray lined with baking paper or 15 cup cake cases
Rice Cookies
How to
Steps:
1. In a mixing bowl beat the egg for a minute.
2. Add the sugar, fruit juice and cardamom powder. Mix with a wooden spoon.
3. Add the margarine and mix for another minute.
4. Add the rice flour and the baking powder. Mix thoroughly for 5 minutes.
5. Cover and keep in the fridge for about 10 to 20 minutes so that the mixture sets and becomes easier to handle.
6. Preheat the oven for 10 minutes and prepare the baking tray.
7. Remove the dugh from the fridge and with the help of a spoon and your hands, make 15 round balls.
8. Place them on the baking tray so that they are about 5 cm apart.
9. Allow to bake for 12 - 15 minutes so that they are golden in colour.
10. Remove from the oven and let them cool for a couple of minutes.
11. Serve on a tray with tea, coffee or fruit juice.
12. You may store them in an air-tight container when they are completely cooled.
Note:
These cookies are ideal for people who are wheat and milk intolerant.
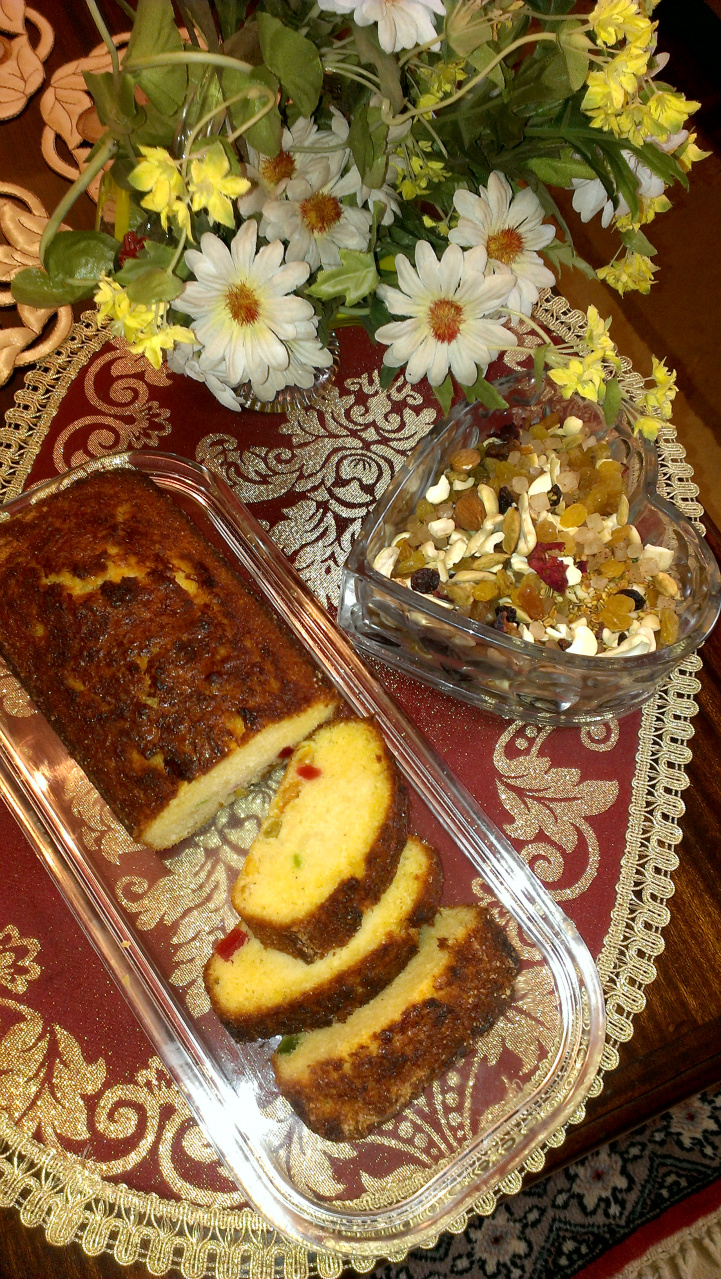
Serves 6 rice fruit cake
What you need
For the Mixture:
1 cup rice flour
3 eggs
3/4 cup soft margarine
3/4 cup sugar
1/2 cup orange [or any other fruit] juice
1 teaspoon baking powder
1 cup mixed candied peel and raisins
For Baking:
Preheated Oven at 180 degree C
Baking tin - 15 cm by 6 cm, lined with baking paper
Rice Fruit Cakee
How to
Steps:
1. In a bowl beat the eggs for a minute.
2. Add the sugar, juice and the margarine. Mix with a wooden spoon for 5 minutes.
3. Add the rice flour and the baking powder. Mix for another 10 minutes.
4. Add the mixed peel and raisins and mix gently.
5. Pour the mixture into the prepared baking tin.
6. Place it in the preheated oven and allow to bake for 40 - 50 minutes till it is golden brown in colour.
7. Check by poking with a skewer or knife. It will come out dry if your cake is ready.
8. Remove it from the oven and allow to cool down for 30 - 40 minutes.
9. Remove carefully onto a cake dish and serve with juice, tea or coffee.
10. You may store the Rice Fruit Cake after covering it with cling-film.
Note:
This cake is ideal for people who are intolerant to wheat and milk.
Serves 8 pieces cassava pan cakes
What you need
For the Batter:
1 egg
2 tablespoons sugar
1/2 teaspoon saly
1 teaspoon baking powder
2 tablespoons cooking oil
1 cup fine cassava flour
1 cup fresh orange juice
1 tablespoon sultanas [optional]
1/4 teaspoon cardamom powder [optional]
1/4 teaspoon cinnamon powder [optional]
For shallow frying:
1/2 cup cooking oil
For the Filling:
1/2 cup honey/ fruit jam/ chocolate syrup
Cassava Pan Cakes
How to
Steps:
1. In a bowl, beat the egg for a minute.
2. Add all the other ingredients and mix the batter thoroughly for 3 minutes.
3. Keep the batter aside for 10 minutes.
4. On medium heat. warm a teaspoon of the cooking oil in a flat non-stick frying pan.
5. With a ladel pour some batter onto the oil till the whole surface of the pan is thinly covered.
6. Allow to cook for a minute and carefully turn over the pancake to cook the other side till gilden brown.
7. Remove the pan cake and place it on a serving plate.
8. Drizzle a tablespoon of the filling of your choice and serve it flat or rolled up.
9. Repeat Steps 4 to 8 till you have made all the 8 pan cakes.
10. Serve the unusually delicious cassava pan cakes with juice, coffee or tea.
Note:
These pan cakes are ideal for people who are intolerant to milk and wheat.
Serves 12 pieces cassava cookies
What you need
For the dough:
1 egg
1/2 cup sugar
1/4 cup soft margarine
1 cup fine cassava flour
1 tablespoon fine gram flour [besan]
1/4 teaspoon baking powder
1/4 teaspoon cardamom powder
2 tablespoons orange juice
1/2 cup mixed candied peel [optional]
For Baking:
Preheat Oven for ten minutes at 180 degrees C
Baking tray lined with baking paper or 12 cup cake cases
Cassava Cookies
How to
Steps:
1. In a bowl whisk the egg for a minute.
2. Add the sugar and mix for another minute.
3. Put in the margarine, cardamom powder and the juice. Mix with a wooden spoon.
4. Add the cassava flour, 'besan' and the baking powder. Mix thoroughly for 10 minutes.
5. Add the 'peel', mix lightly, cover and leave in the fridge for 15-20 minutes.
6. Remove from the fridge. Using a spoon and your hand, divide and roll into 12 balls.
7. Place the balls on the prepared baking tray or the cup cake cases.
8. Put the tray into the preheated oven and allow to bake for 12-15 minutes till golden brown.
9. Remove from the oven. Let them cool for 5 minutes and then put them on a serving dish.
10. Present the exotic Cassava cookies with juice, tea or coffee.
Note:
The Cassava Cookies ae ideal for people who are intolerant to wheat and milk.
Serves 6 cassava fruit cake
What you need
For the Batter:
1 egg
1/2 cup fine sugar
1/4 cup melted maegarine
1 cup fine cassava flour
1 tablespoon 'besan' [gram flour]
1 teaspoon baking powder
1/4 teaspoon 'elachi' [cardamom] powder
1/4 cup orange [or any other fruit] juice
1/2 cup mixed candied peel, cherries and sultanas
For Baking:
1 small baking tin lined with greased paper
Preheated oven for 10 minutes at 180 degrees C
Cassava Fruit Cake
How to
Steps:
1. In a bowl beat the egg for a minute.
2. Add the sugar, margarine, orange juice and elachi powder. Mix thoroughly for a couple of minutes.
3. Add the cassava flour, 'besan' and the baking powder. Mix with a wooden spoon for ten minutes so hat the batter is smooth.
4. Gently mix in the candied fruit and peel.
5. Pour into the prepared baking tin and place in the preheated oven on the middle rack.
6. Allow to bake for 40 to 50 minutes till golden brown. Check by poking in a spatula that should come out dry.
7. Remove from the oven and allow to cool for 10 minutes.
8. Ease out and place the Cassava Fruit Cake onto a serving dish.
9. Have it with tea, coffee or fruit juice.
Note:
This cake is ideal for people who ar intolerant to wheat and milk products.
Serves 12 pieces cassava banana fritters
What you need
For the dough
2 large very ripe bananas
1 cup fine cassava flour
For deep frying
1/2 litre cooking oil
Cassava Banana Fritters
How to
Steps
1. In a large bowl, mash thoroughly the peeled bananas with a fork.
2. Add the cassava flour, a little at a time, and mix.
3. With you clean hand knead the dough into a ball and leave it to rest for at least one hour.
4. In a deep frying pan heat the oil till it is medium warm.
5. Using your hands [or board and rolling pin] take a ball of the dough, about 3 cm wide and flatten it to a disc 1/2 cm thick and 6 cm in diameter.
6. Carefully slide it into the warm oil. Let it fry for 30 seconds and turn it over.
7. It should rise into a ball. When both the sides are golden brown, remove from the oil and place on some absorbent paper.
8. Repeat steps 5 to 7 till the dough is finished.
9. Serve hot with tea or coffee.
Comments
Holly Hooper
27.10.2021 13:23
Here is a variation which keeps the chicken really moist. grill on pan for the time suggested, then move to a roasting pan. pour a little chicken stock over to coat and cover bottom of pan, then bake
'%20fill%3D'rgb(0,%200,%200)'%3E%3Ctitle%3Ereply%3C%2Ftitle%3E%3Cpath%20d%3D'M32%2020q0%202.976-2.272%208.064-0.064%200.128-0.192%200.416t-0.224%200.544-0.256%200.384q-0.192%200.32-0.48%200.32t-0.416-0.192-0.16-0.448q0-0.16%200.032-0.48t0.064-0.416q0.096-1.216%200.096-2.208%200-1.792-0.32-3.232t-0.864-2.464-1.44-1.792-1.888-1.248-2.368-0.768-2.752-0.384-3.136-0.096h-4v4.576q0%200.448-0.32%200.8t-0.832%200.352-0.8-0.352l-9.12-9.152q-0.352-0.32-0.352-0.8t0.352-0.8l9.12-9.152q0.352-0.32%200.8-0.32t0.832%200.32%200.32%200.8v4.576h4q12.736%200%2015.616%207.2%200.96%202.4%200.96%205.952z'%2F%3E%3C%2Fsvg%3E)
Shama
27.10.2021 15:39
Thanks for the tip and the interest. Do check other pages for sweet and savoury recipes.
Shama
13.10.2021 08:27
Bon apetit. Do check out other pages. Bless you
Jayme Silvestri
13.10.2021 06:02
Made the chicken for my meal prep and I can’t wait to taste it. Easy recipe thanks for posting it!
<a href="https://thebestfucksites.com/">Jayme Silvestri</a>
Kelly Hubbard
26.08.2021 11:45
I’m a teenager who is absolutly in love with cooking, and I saw this on your youtube channel one day and I decided to make it for my parents. I really like the info you share, it’s really helpful.
Shama
26.08.2021 13:37
Thanks for your appreciation. Do check out the other pages. Keep up the cooking passion!
Harold Burton
12.06.2021 04:22
I have been pre-cooking ground beef for a long time – it is just so much easier to do it once and be done with if for a while. Sometimes I cook a batch that is just plain ground beef – and then I’ll d
Shama
12.06.2021 07:36
Yes that reduces your work next time. But freshly cooked is better any time for traditional foods. Other wise the taste will not be same
Latest comments
19.11 | 07:25
You are so kind. Do see other pages on menu. You will enjoy. Bless you. Luvv.
19.11 | 01:25
Sad to know that Ms M Butt is no more. May her soul rest in eternal peace... Ameen ❤️
19.11 | 01:22
You were my favorite biology teacher. I never forgot you😊
22.06 | 09:34
Thanks dear arfa. Check out other pages on the menu. You will enjoy. God bless.
Share this page